Game > GameAnvil > Console User guide > Creating a Server
GameAnvil Menu and Tab
The GameAnvil console is divided into menus, each of which is composed of tabs. For example, Monitor, Server, and Operationare menus, and the Monitoring menu is composed of the Dashboard, Server Status, User Distribution, and Autoscale Group tabs.

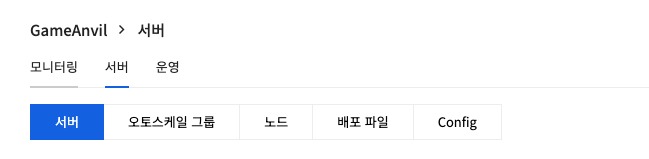
The Server menu consists of the Server, Autoscale Group, Node, Deployment file, and Config tabs.
Operation consists of the Run abd History tabs.

This document focuses on the functions of these menus and tabs.
Prepare to Create Server
To create a server, at least a server binary and associated settings and data are required. The console provides a deployment file and Config tab in the Server menu for this.
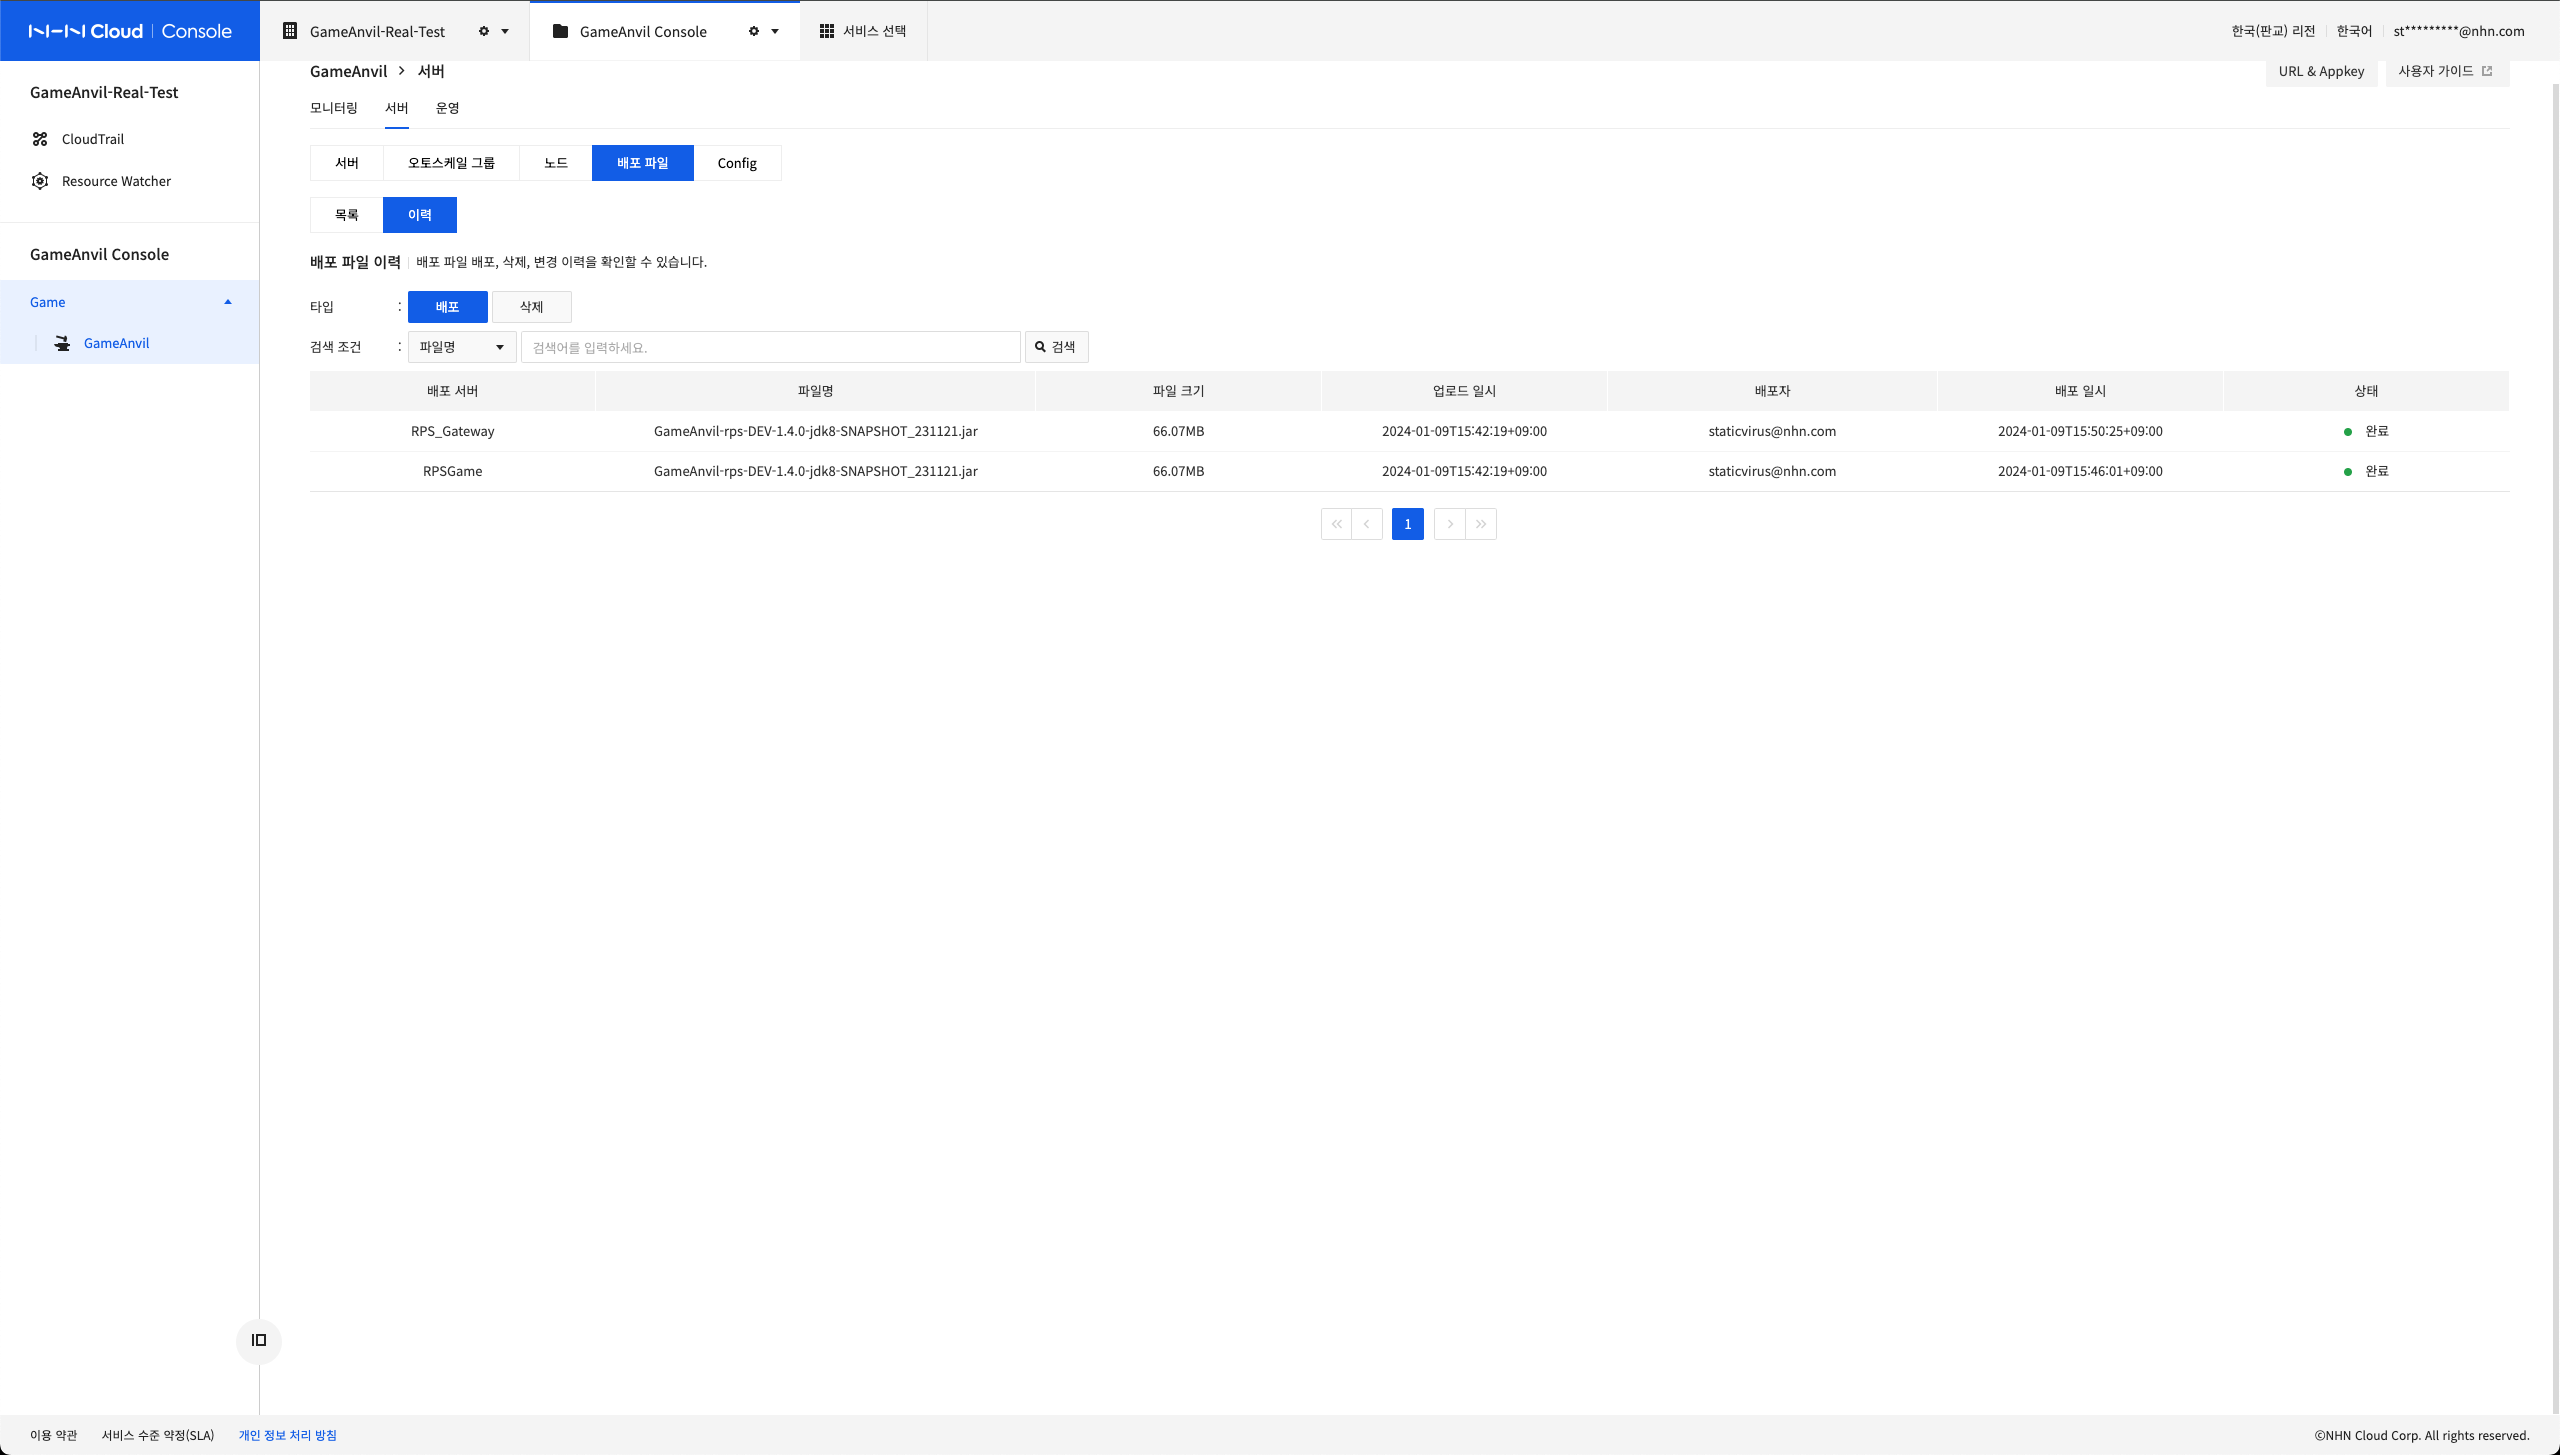
You can upload the game server binary to the deployment files tab. Uploaded binaries are managed as shown in the screen below. When you create the server, you will choose one of these deployment files to automatically deploy to each instance.
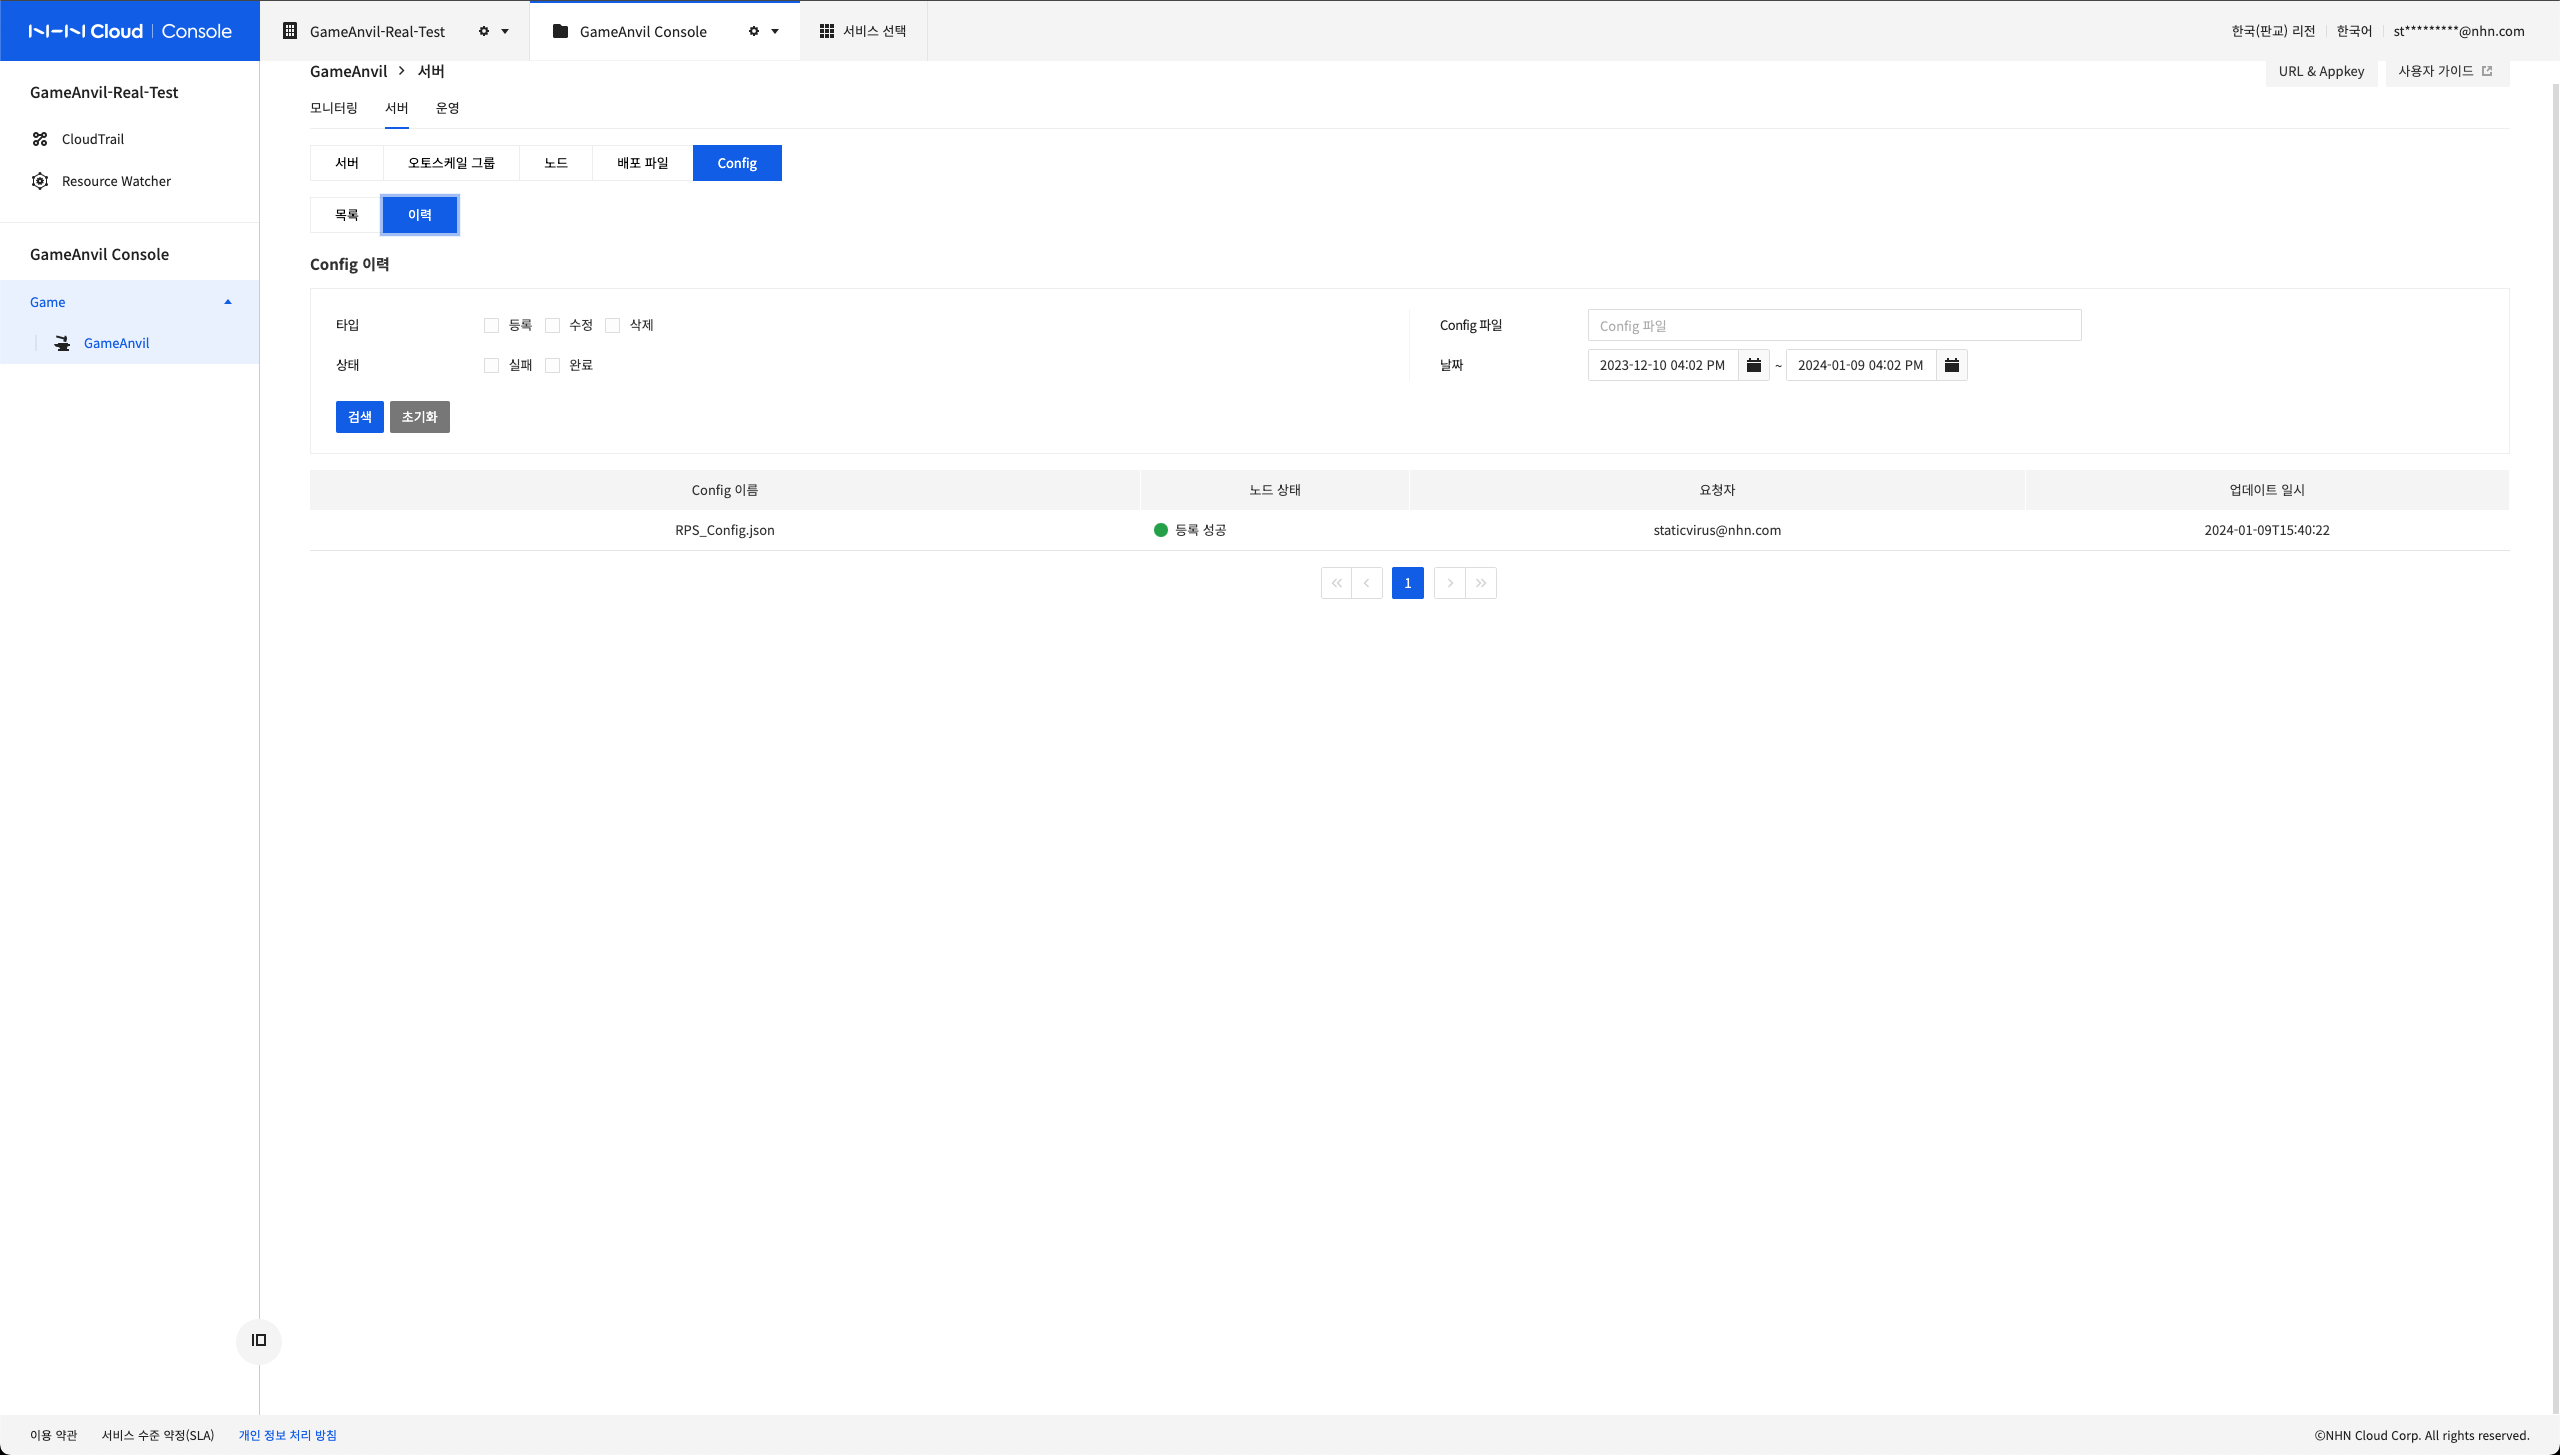
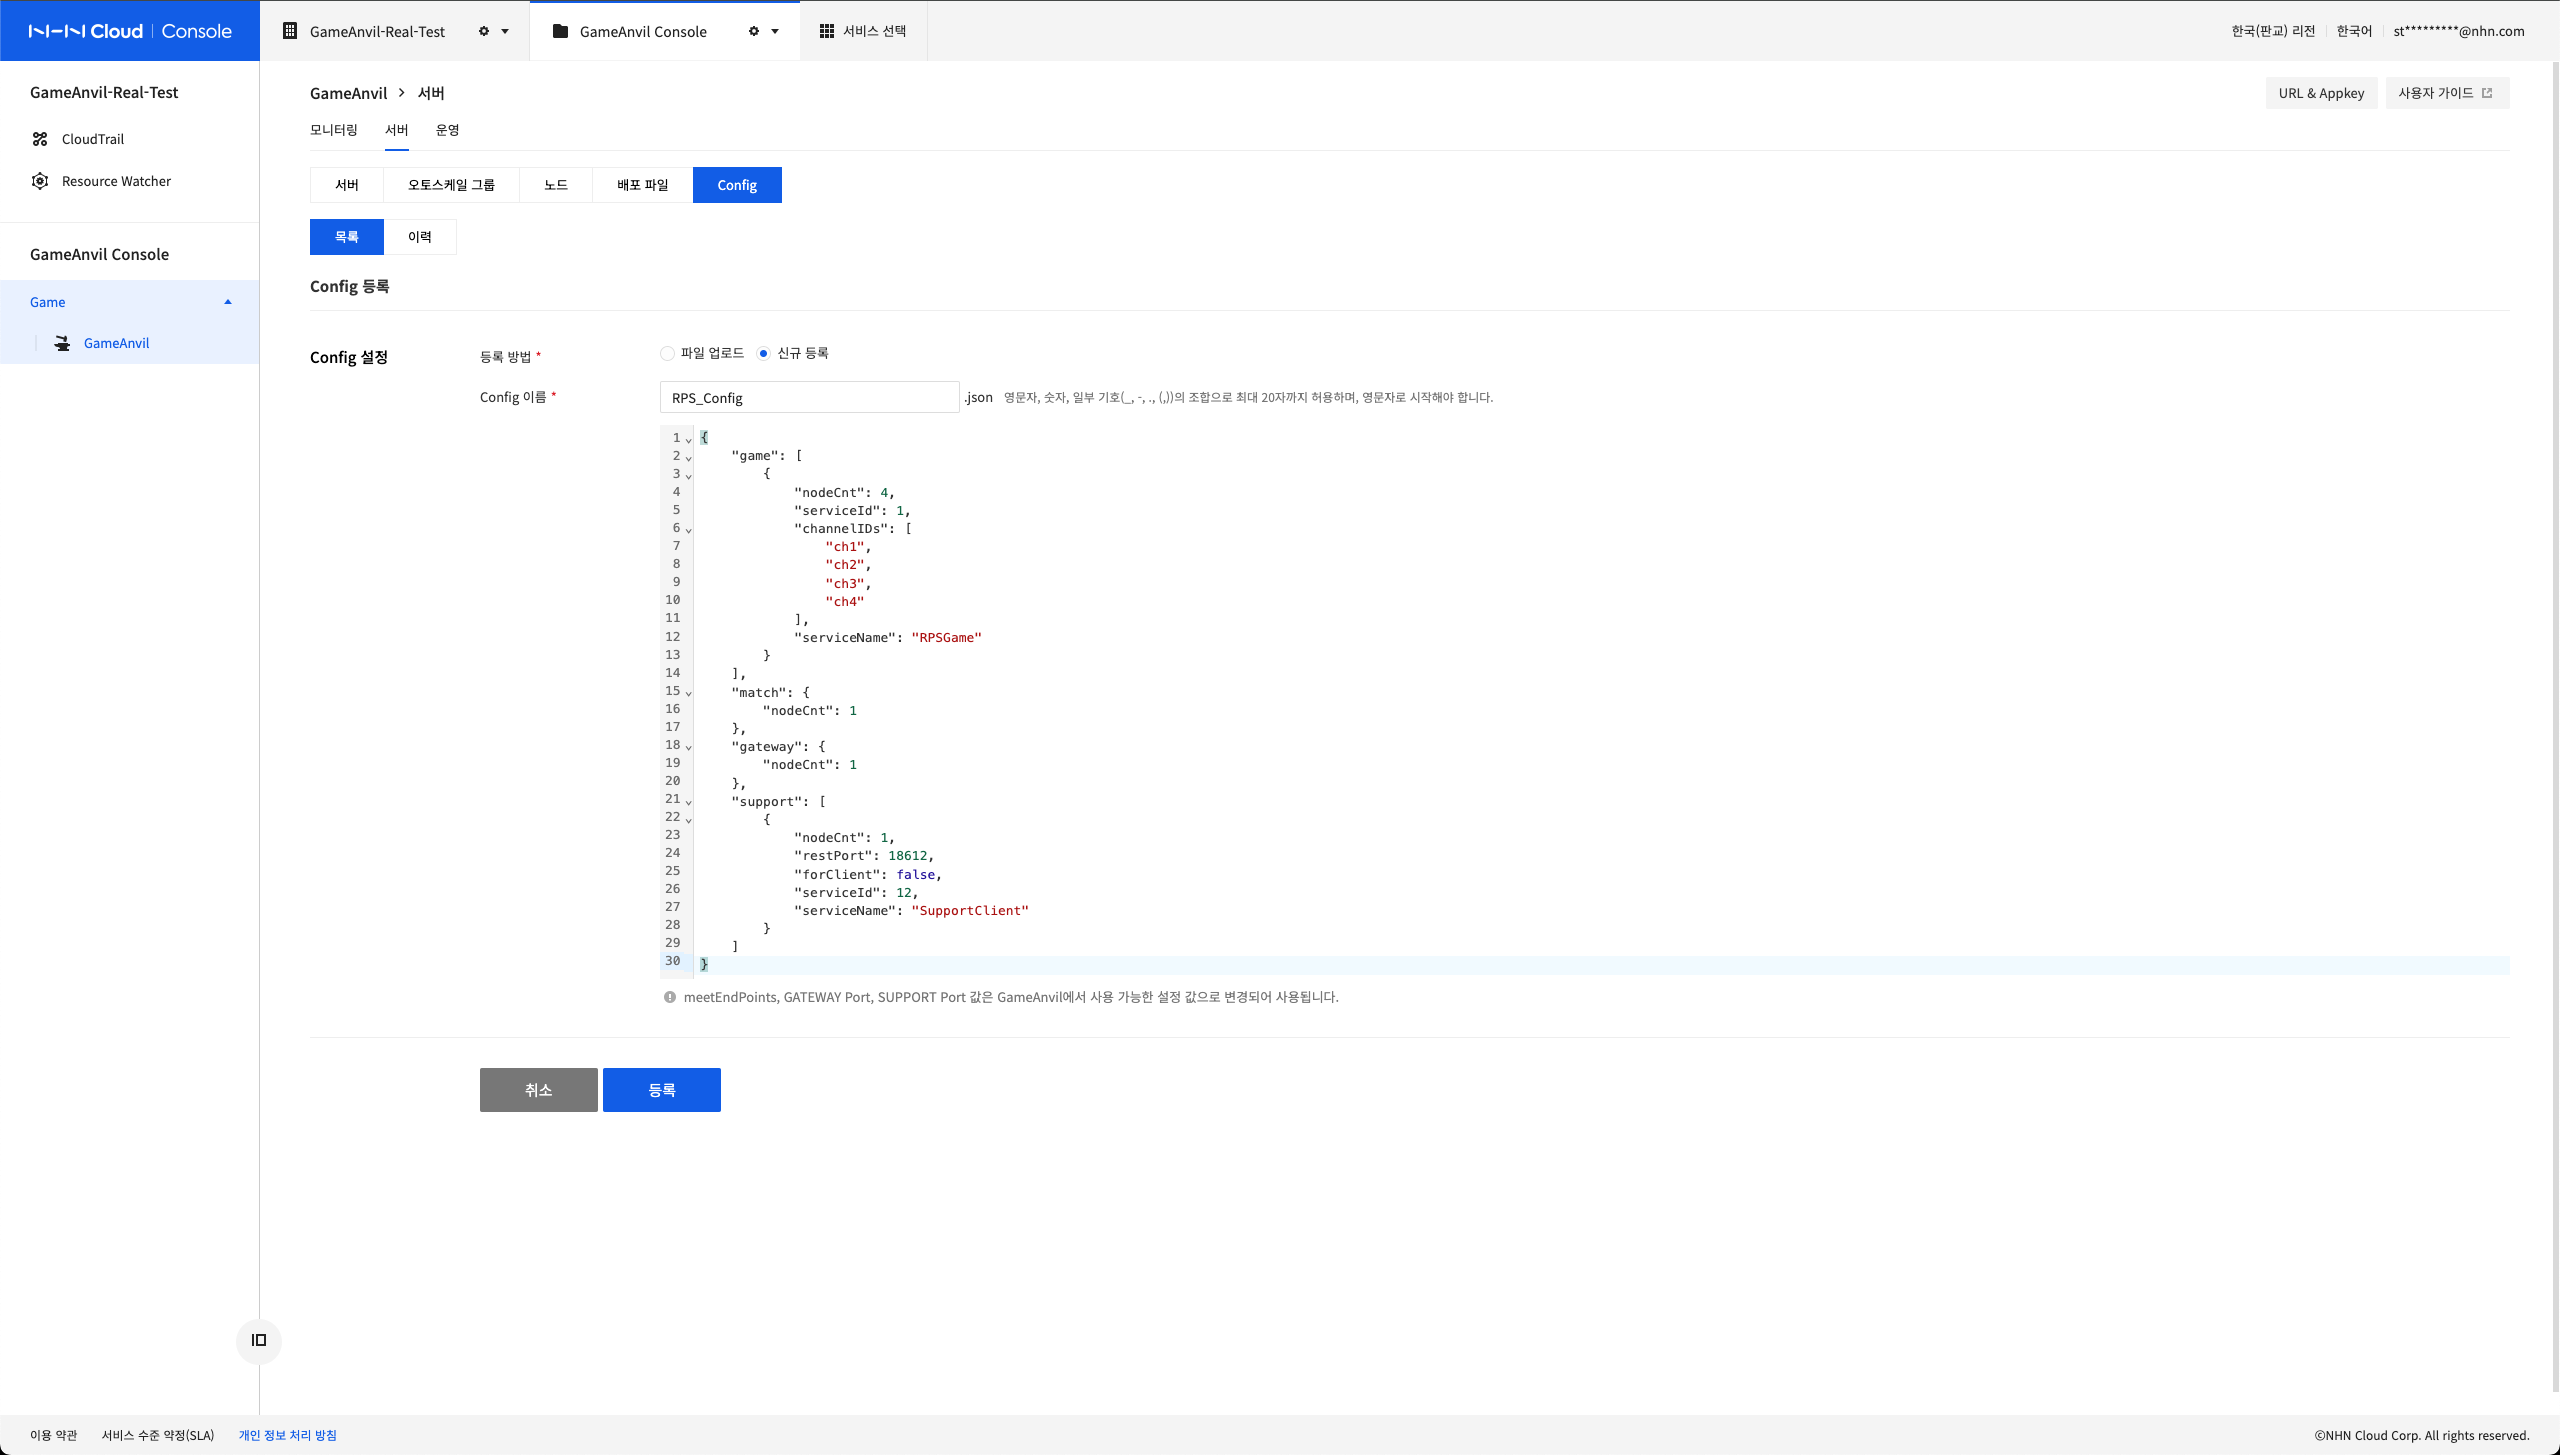
Like deployment files, you must register the configuration information (Config) to run the server. This allows you to determine on which settings you want to run the server binary. These configuration files are also managed separately, as shown in the following screen.
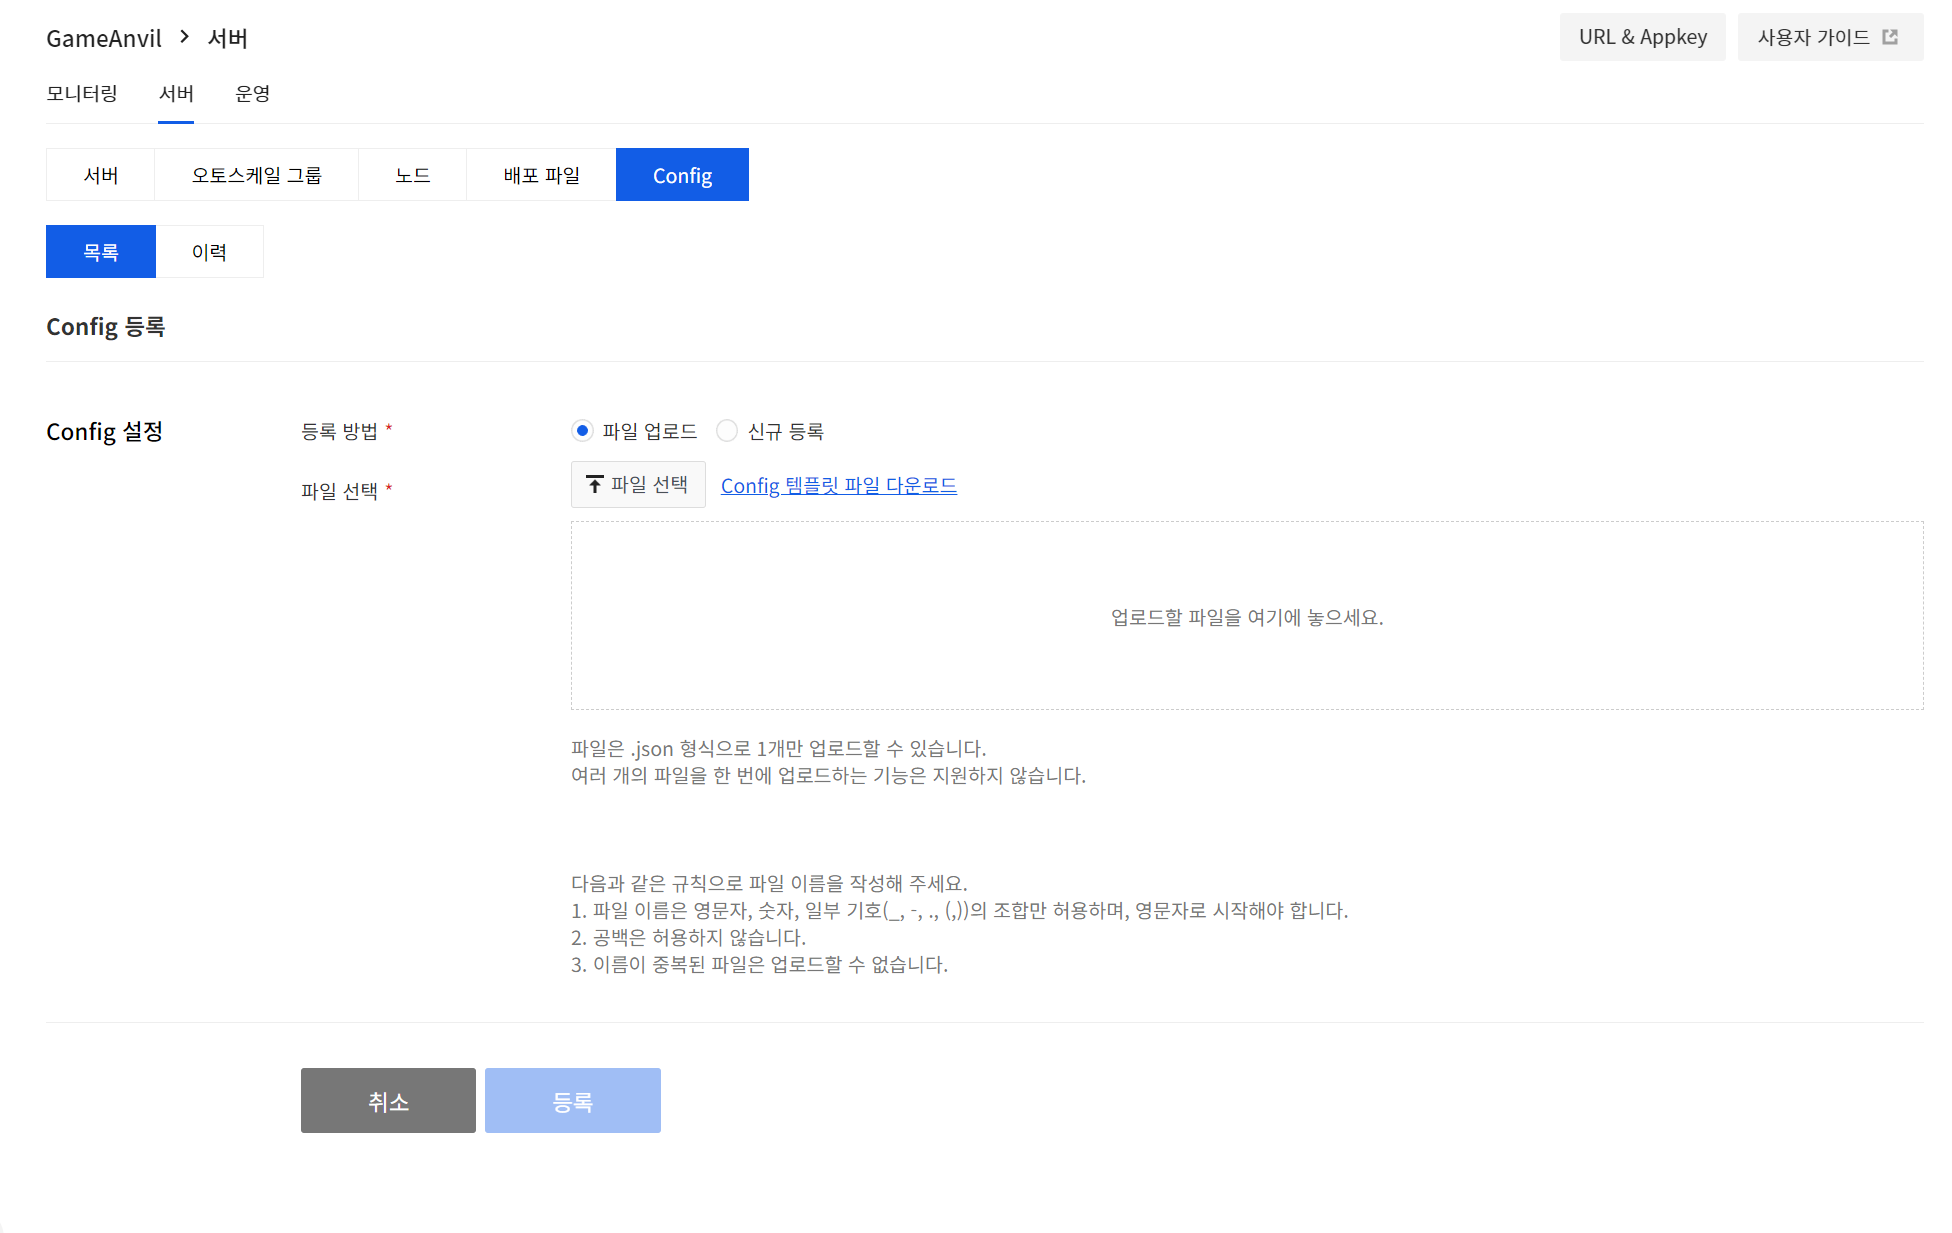
There are two main methods to register configuration information (Config). The first is to upload a pre-generated JSON file as shown in the screen below. If you are creating a configuration information (Config) file for the first time, you can download and use the template by clicking Download Config Template.
The second method is to enter the configuration information directly using the editing window as shown in the screen below. There is no difference other than the registration method, so select the method where you want to register the configuration information.
You can also view the list of registered deployment files and configuration files, as well as any history in the History tab.
Create Server
Once the deployment and config files have been successfully registered in the previous process, you can now create a server, which can be used for any purpose, such as testing or development, as well as actual services.
To create a server, on the Servers menu in the console, click on Create Server.
The Create Server page appears as follows. Use this document to create a server by referring to the server basics information and node configuration details.
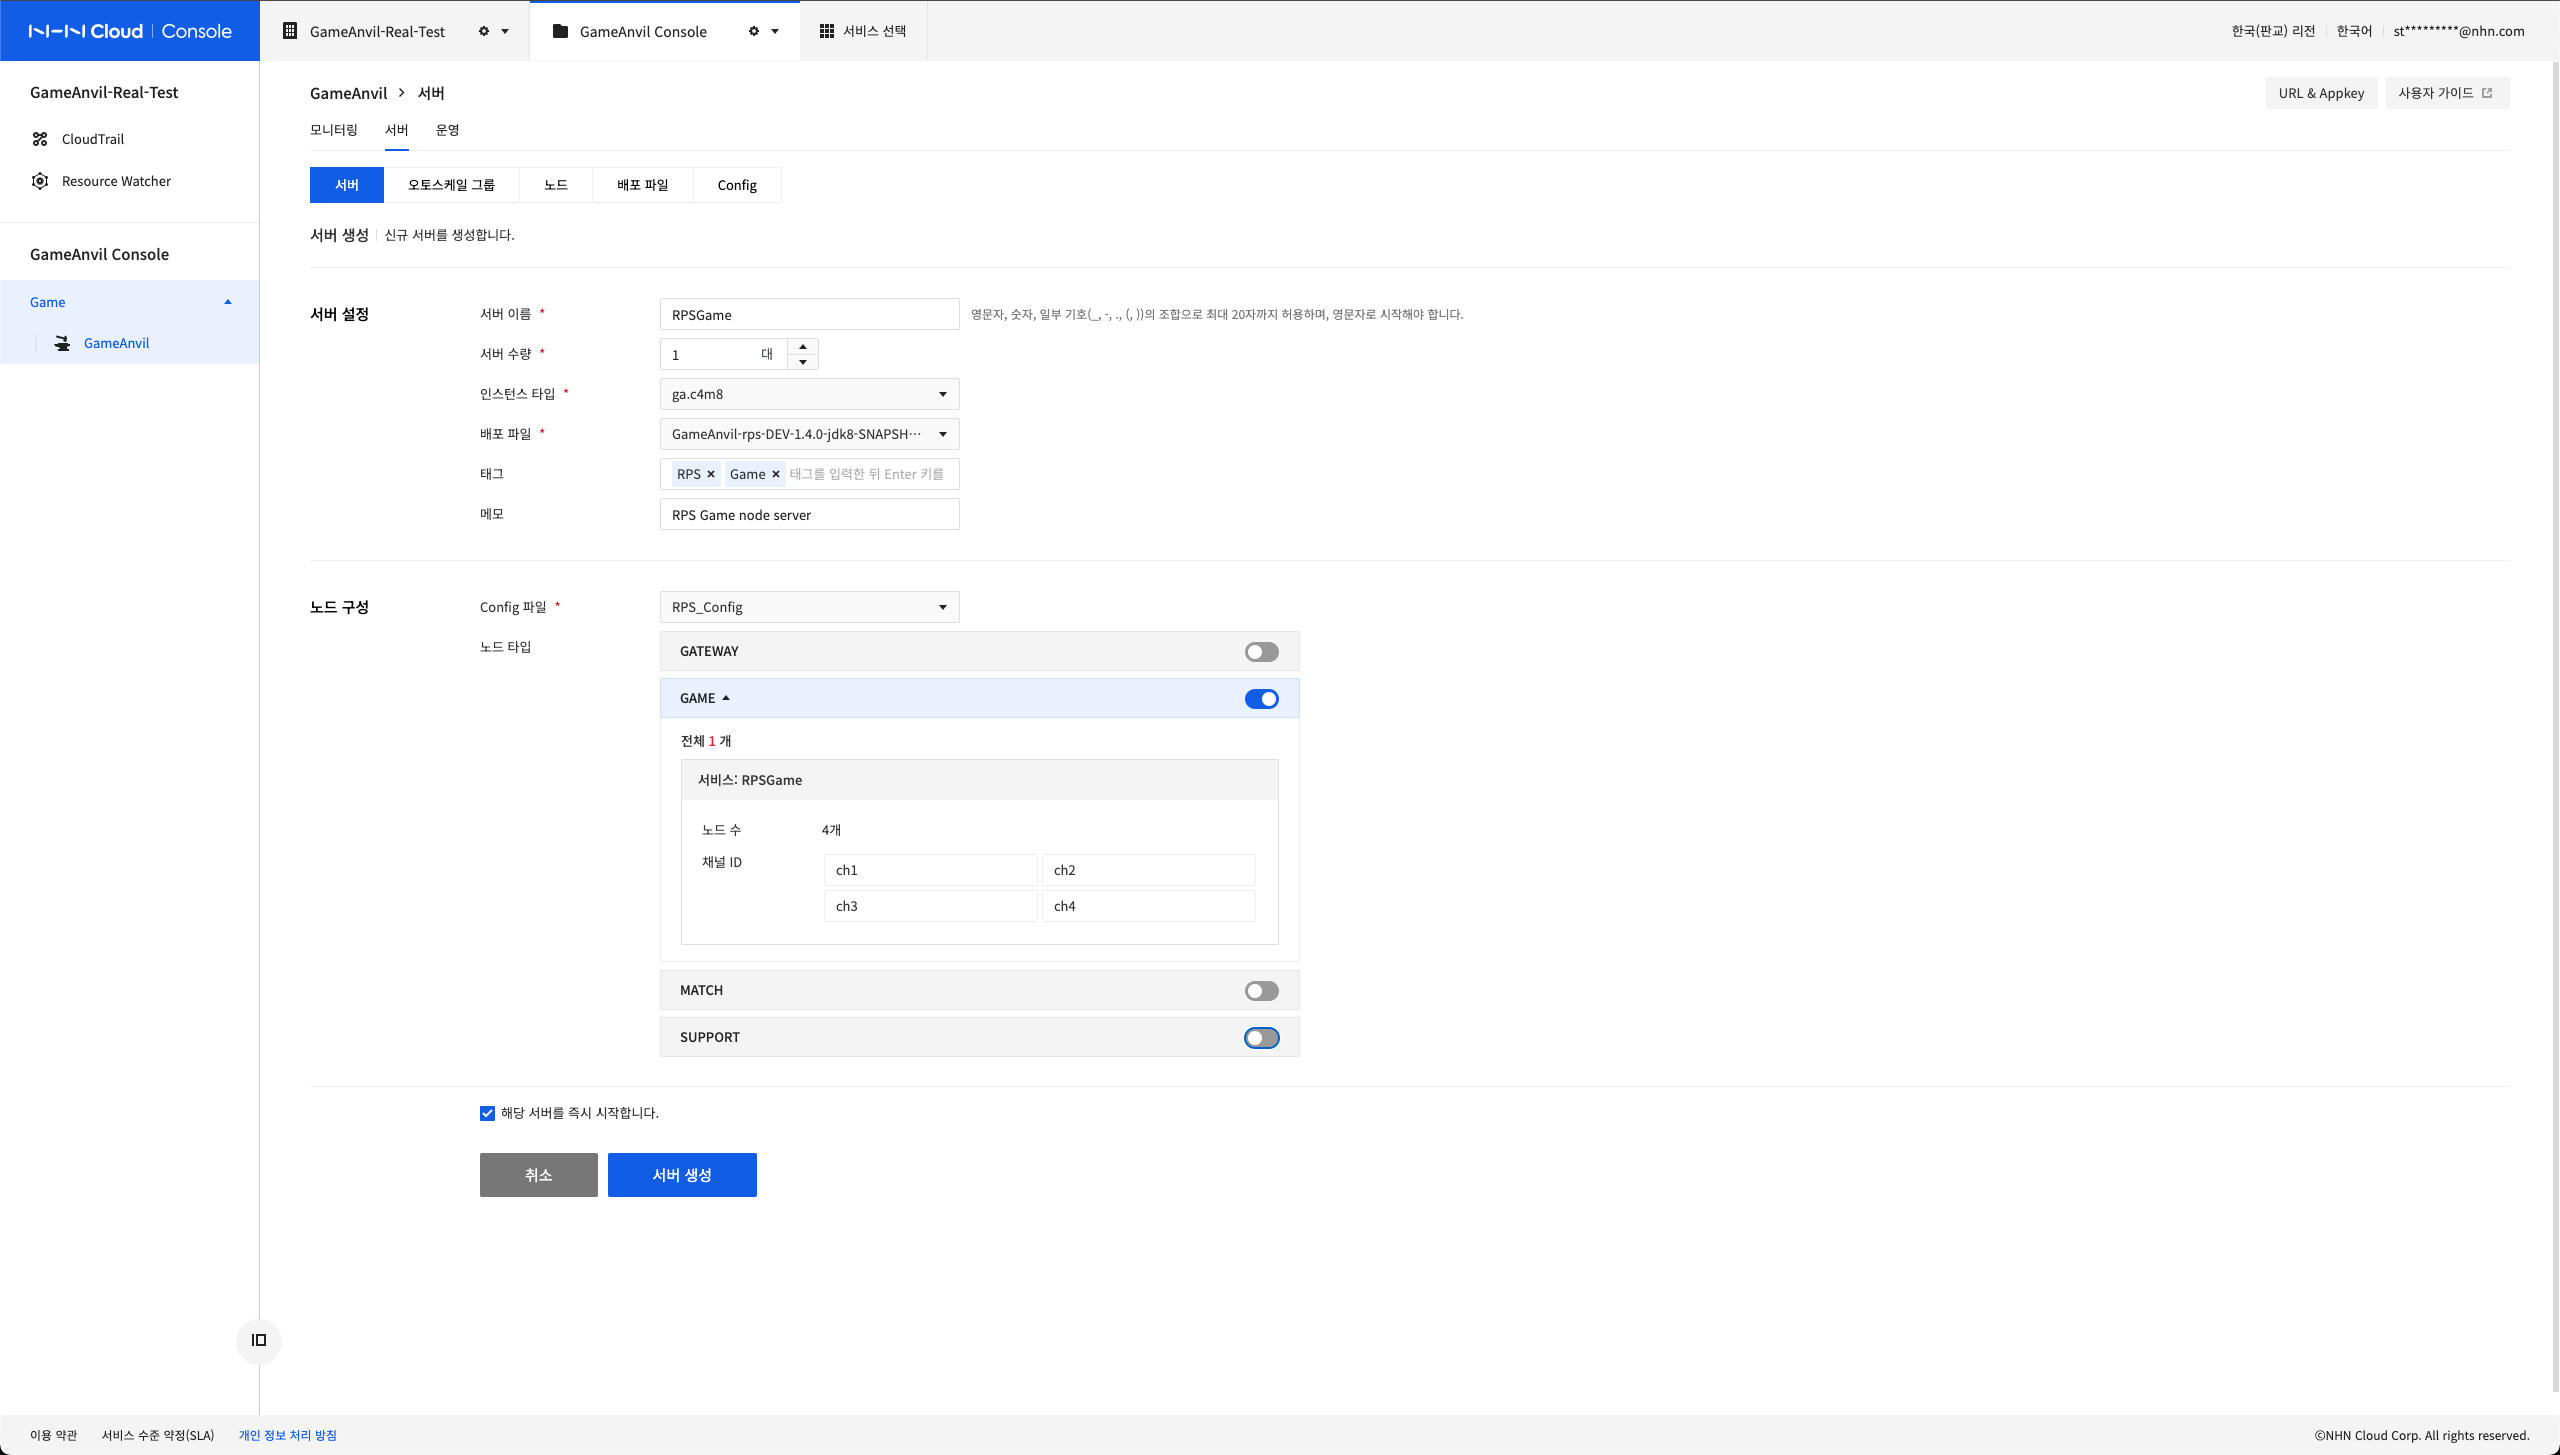
Server Basic Information

-
Server Name: Specifies a unique identifier that represents the server to be currently configured. If you start multiple servers with the same identifier, that identifier is followed by a unique numbering that increases by 1 to 1.
-
Number of Servers: sets the number of servers to start.
-
Instance Type: select the type of server instance you want to create.
-
Deployment File: select the uploaded server binary to start the server. At least one server binary must be uploaded before selection. You can manage the server binary from the Deployment Files tab.
-
Tag: you can create any tag for the server configuration.
-
Memo: you can write a brief memo about that server. This memo is not a value that affects your server's configuration or operations.
Node Configuration
The nodes in GameAnvil are functional units of the game server. The developed server binary contains all kinds of node implementations to be used in the game. Server processes powered by these binary logs can only be configured with any selected node, depending on settings and are set based on the configuration information (Config) that you registered before creating the server. That is, the configuration information (Config) contains node configuration information. If multiple configuration information (Config) is registered, you can select the configuration to apply from the list. You can also enable or disable node settings included in the configuration information by node type.
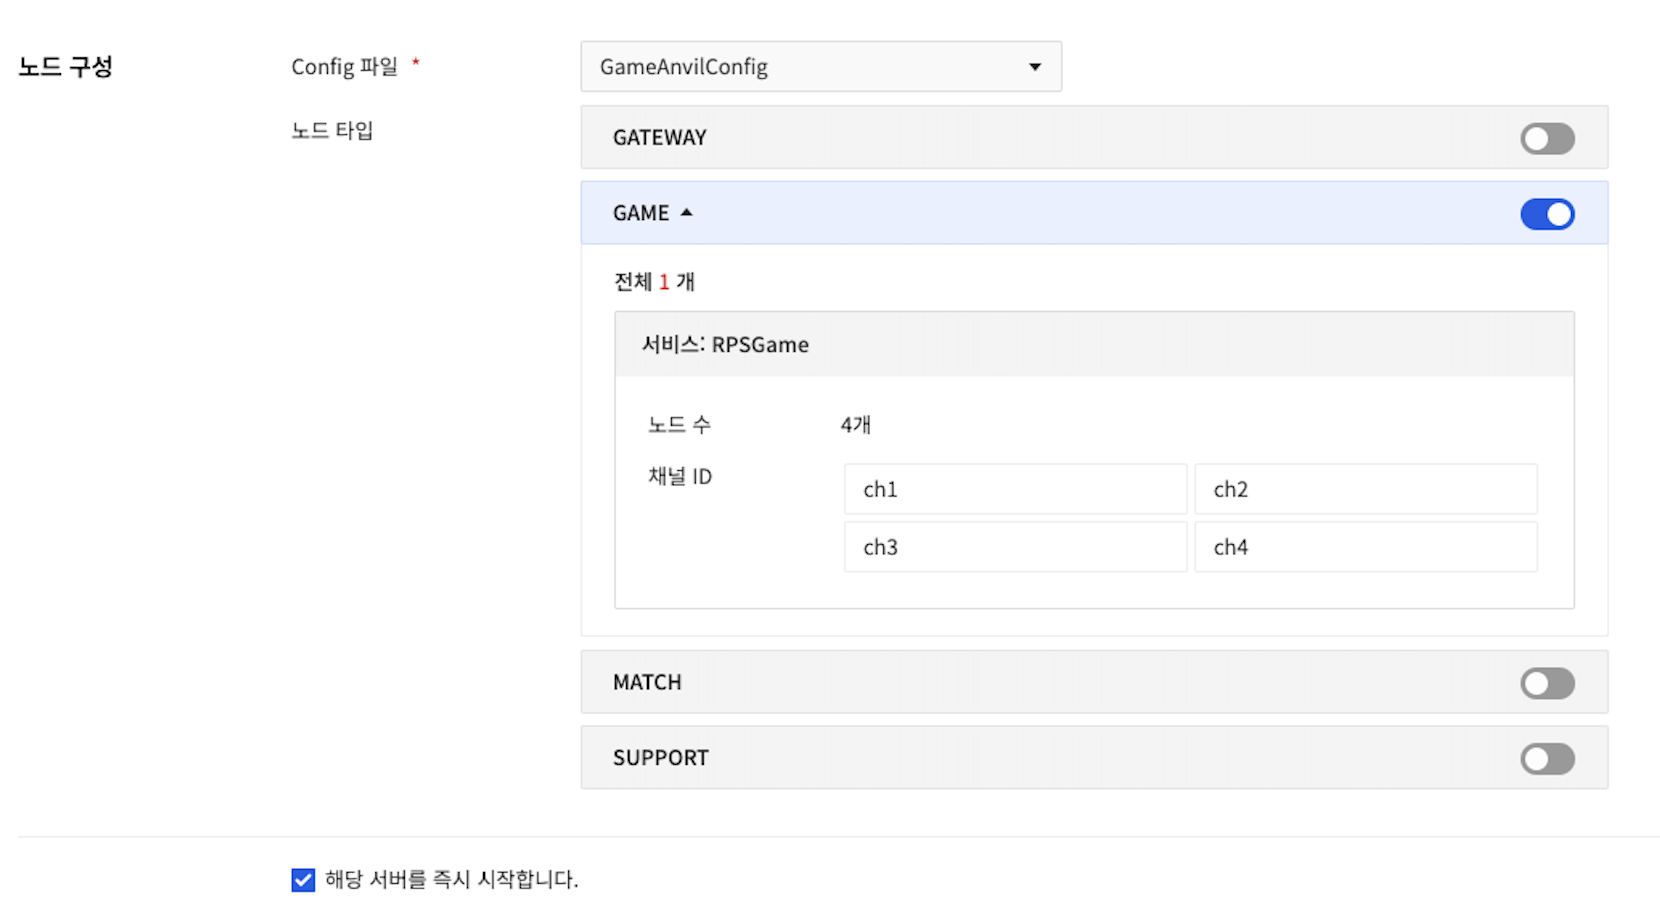
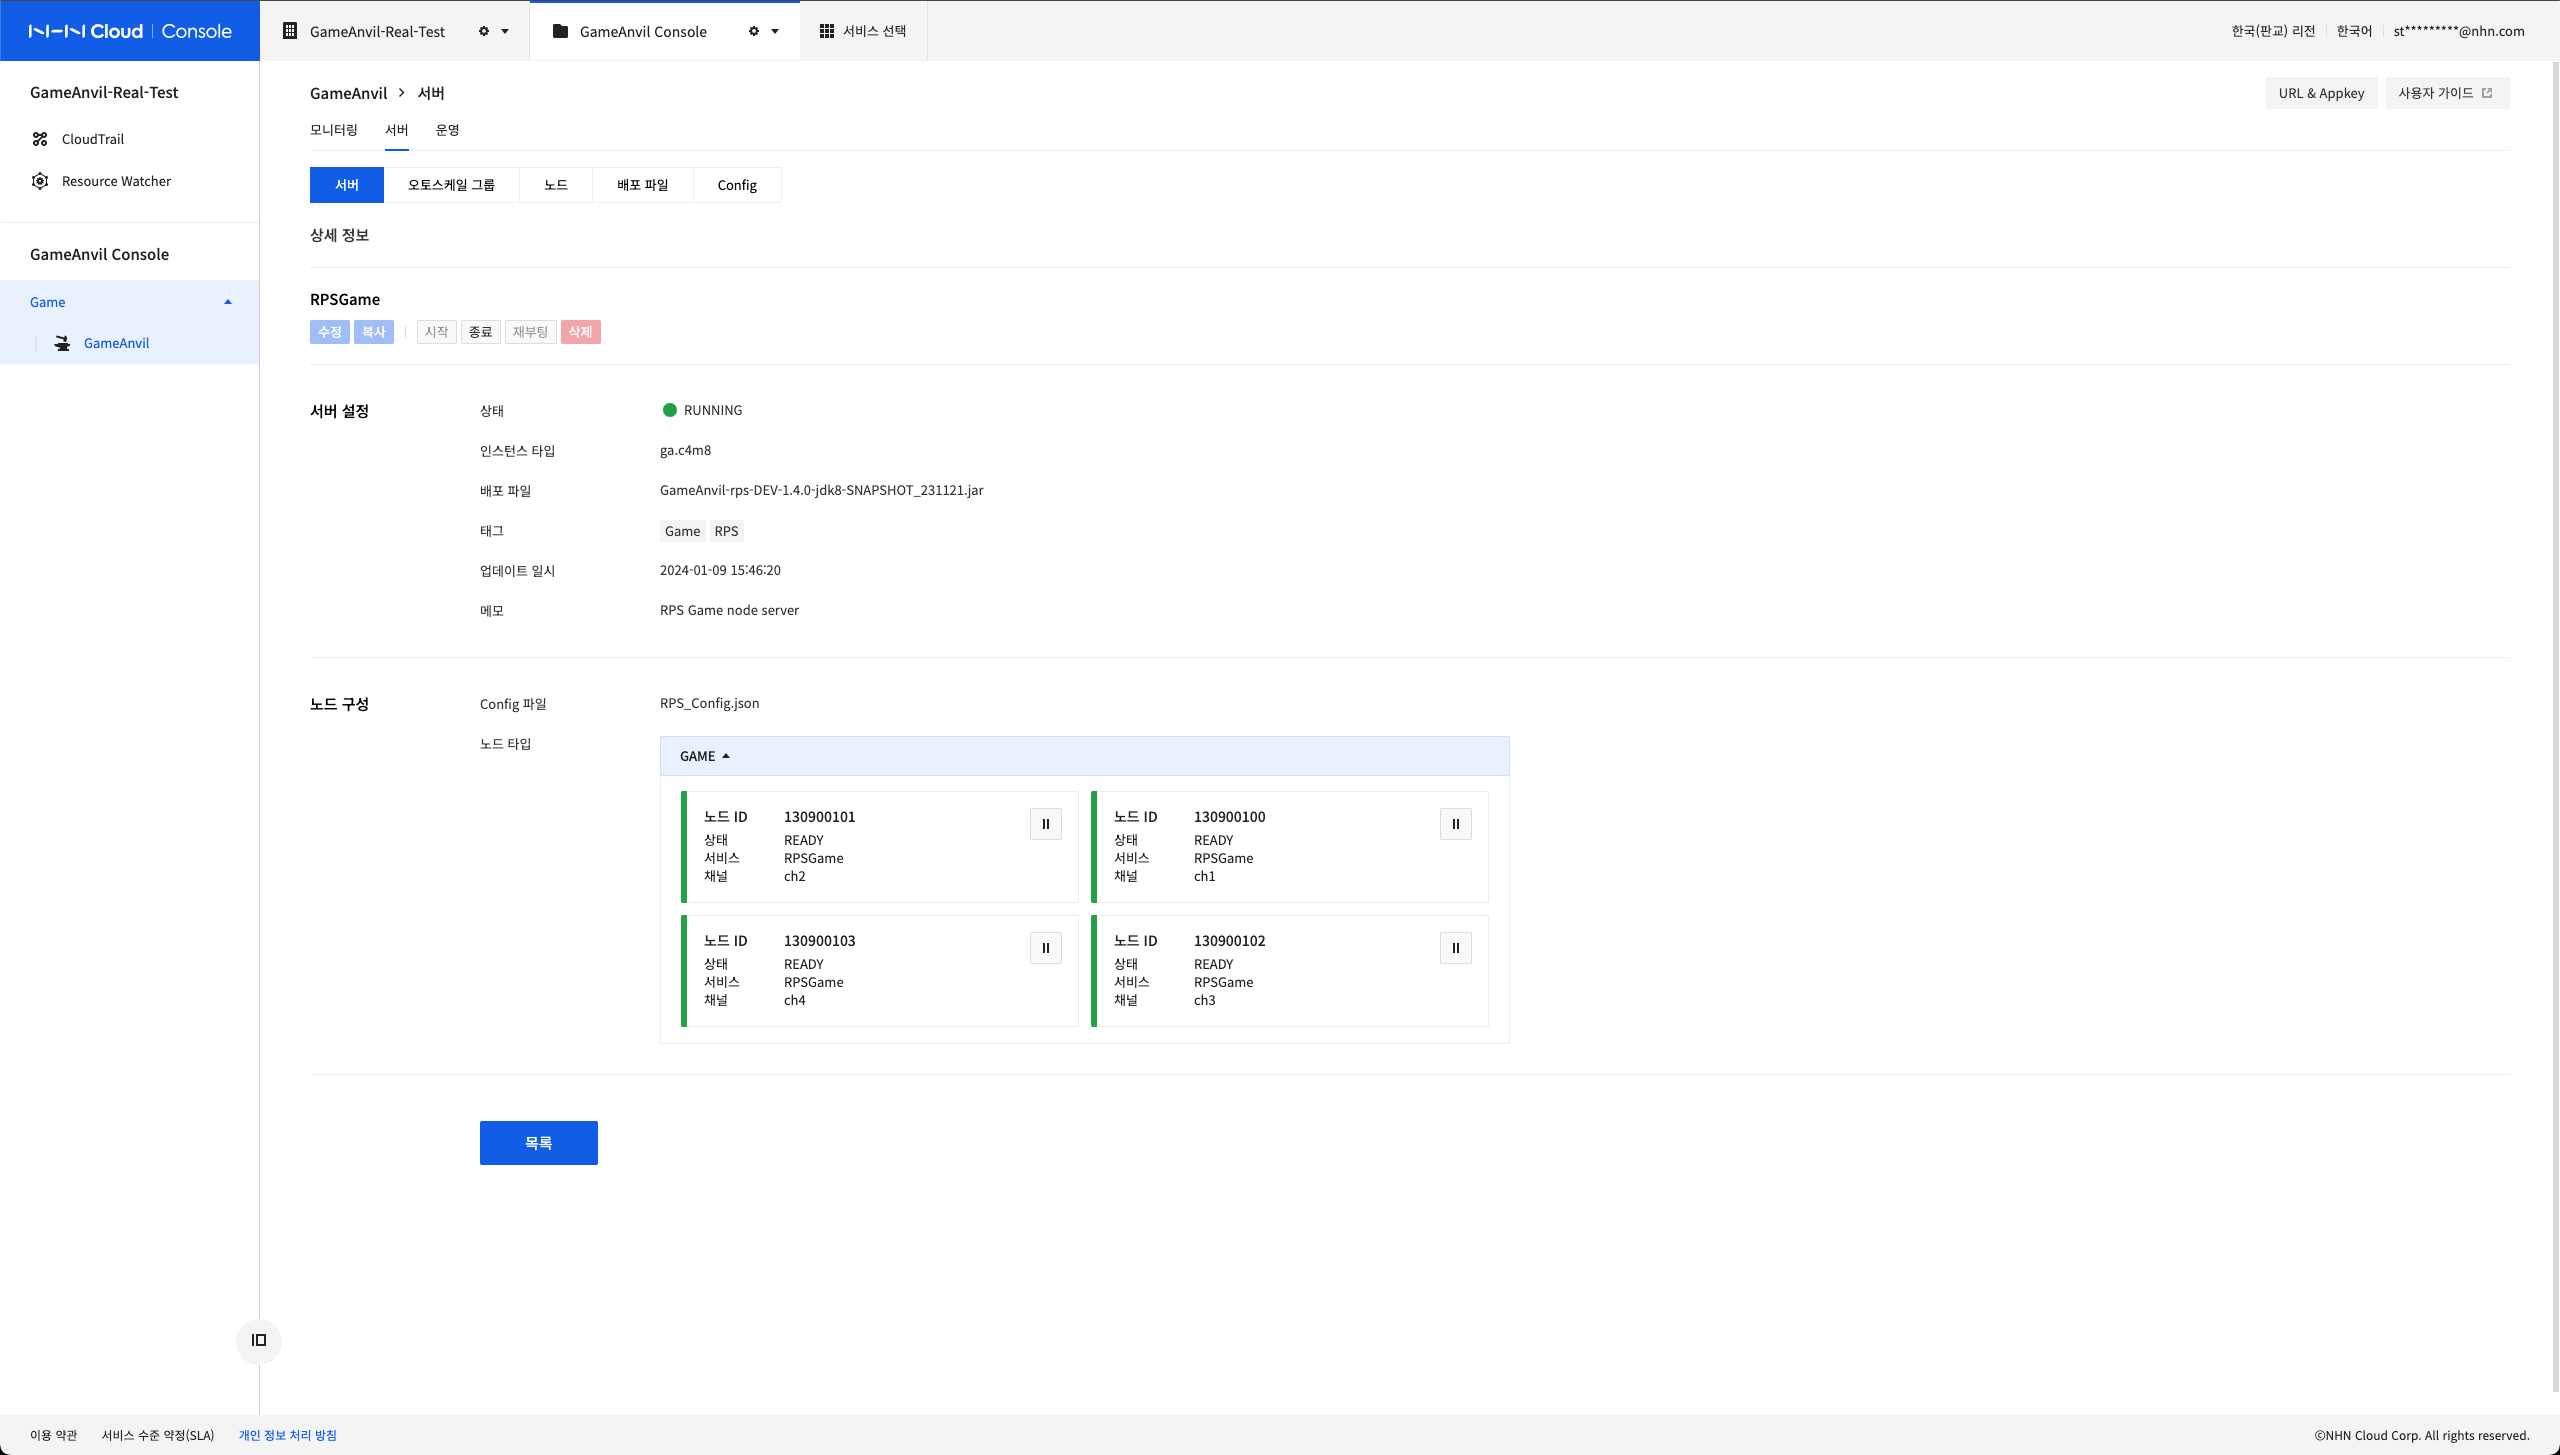
The above image consists of a total of four game nodes as follows.
| Node type | Service name | Count of running | Description |
|---|---|---|---|
| GAME | RPSGame | 4 | It is a game node where game content is implemented and is responsible for channels from ch 1 to ch 4, respectively. |
At this time, the service name entered in the configuration information (Config) must be the same as the information used in server development. If you enter a value different from the information used in the server implementation, the server will not run normally. The channel value is also exposed as it is in the configuration information (Config).
Click the check box to check if you want the server to start automatically upon creation. It is recommended to use the default value (Start immediately upon creation).
Check Created Server
After you configure a server, running it creates the number of servers you set. The created servers start in the TRANSIT state and are colored yellow. It may take several minutes (from 1 to 60 minutes or more) depending on the state of the NHN Cloud infrastructure before the server progresses to the RUNNING state. Especially when the GameAnvil service is running the first server, it may take a little longer as it simultaneously performs basic infrastructure settings. During this time, you can configure additional servers of different types or use other menus.
When the server runs normally, it changes to RUNNING state as shown in the image. Click on this generated server to see the server information. In this case, the user can shut down, delete, or reboot the server through the server control command. Alternatively, the multiple select buttons can be used to select multiple servers at once to execute the command.
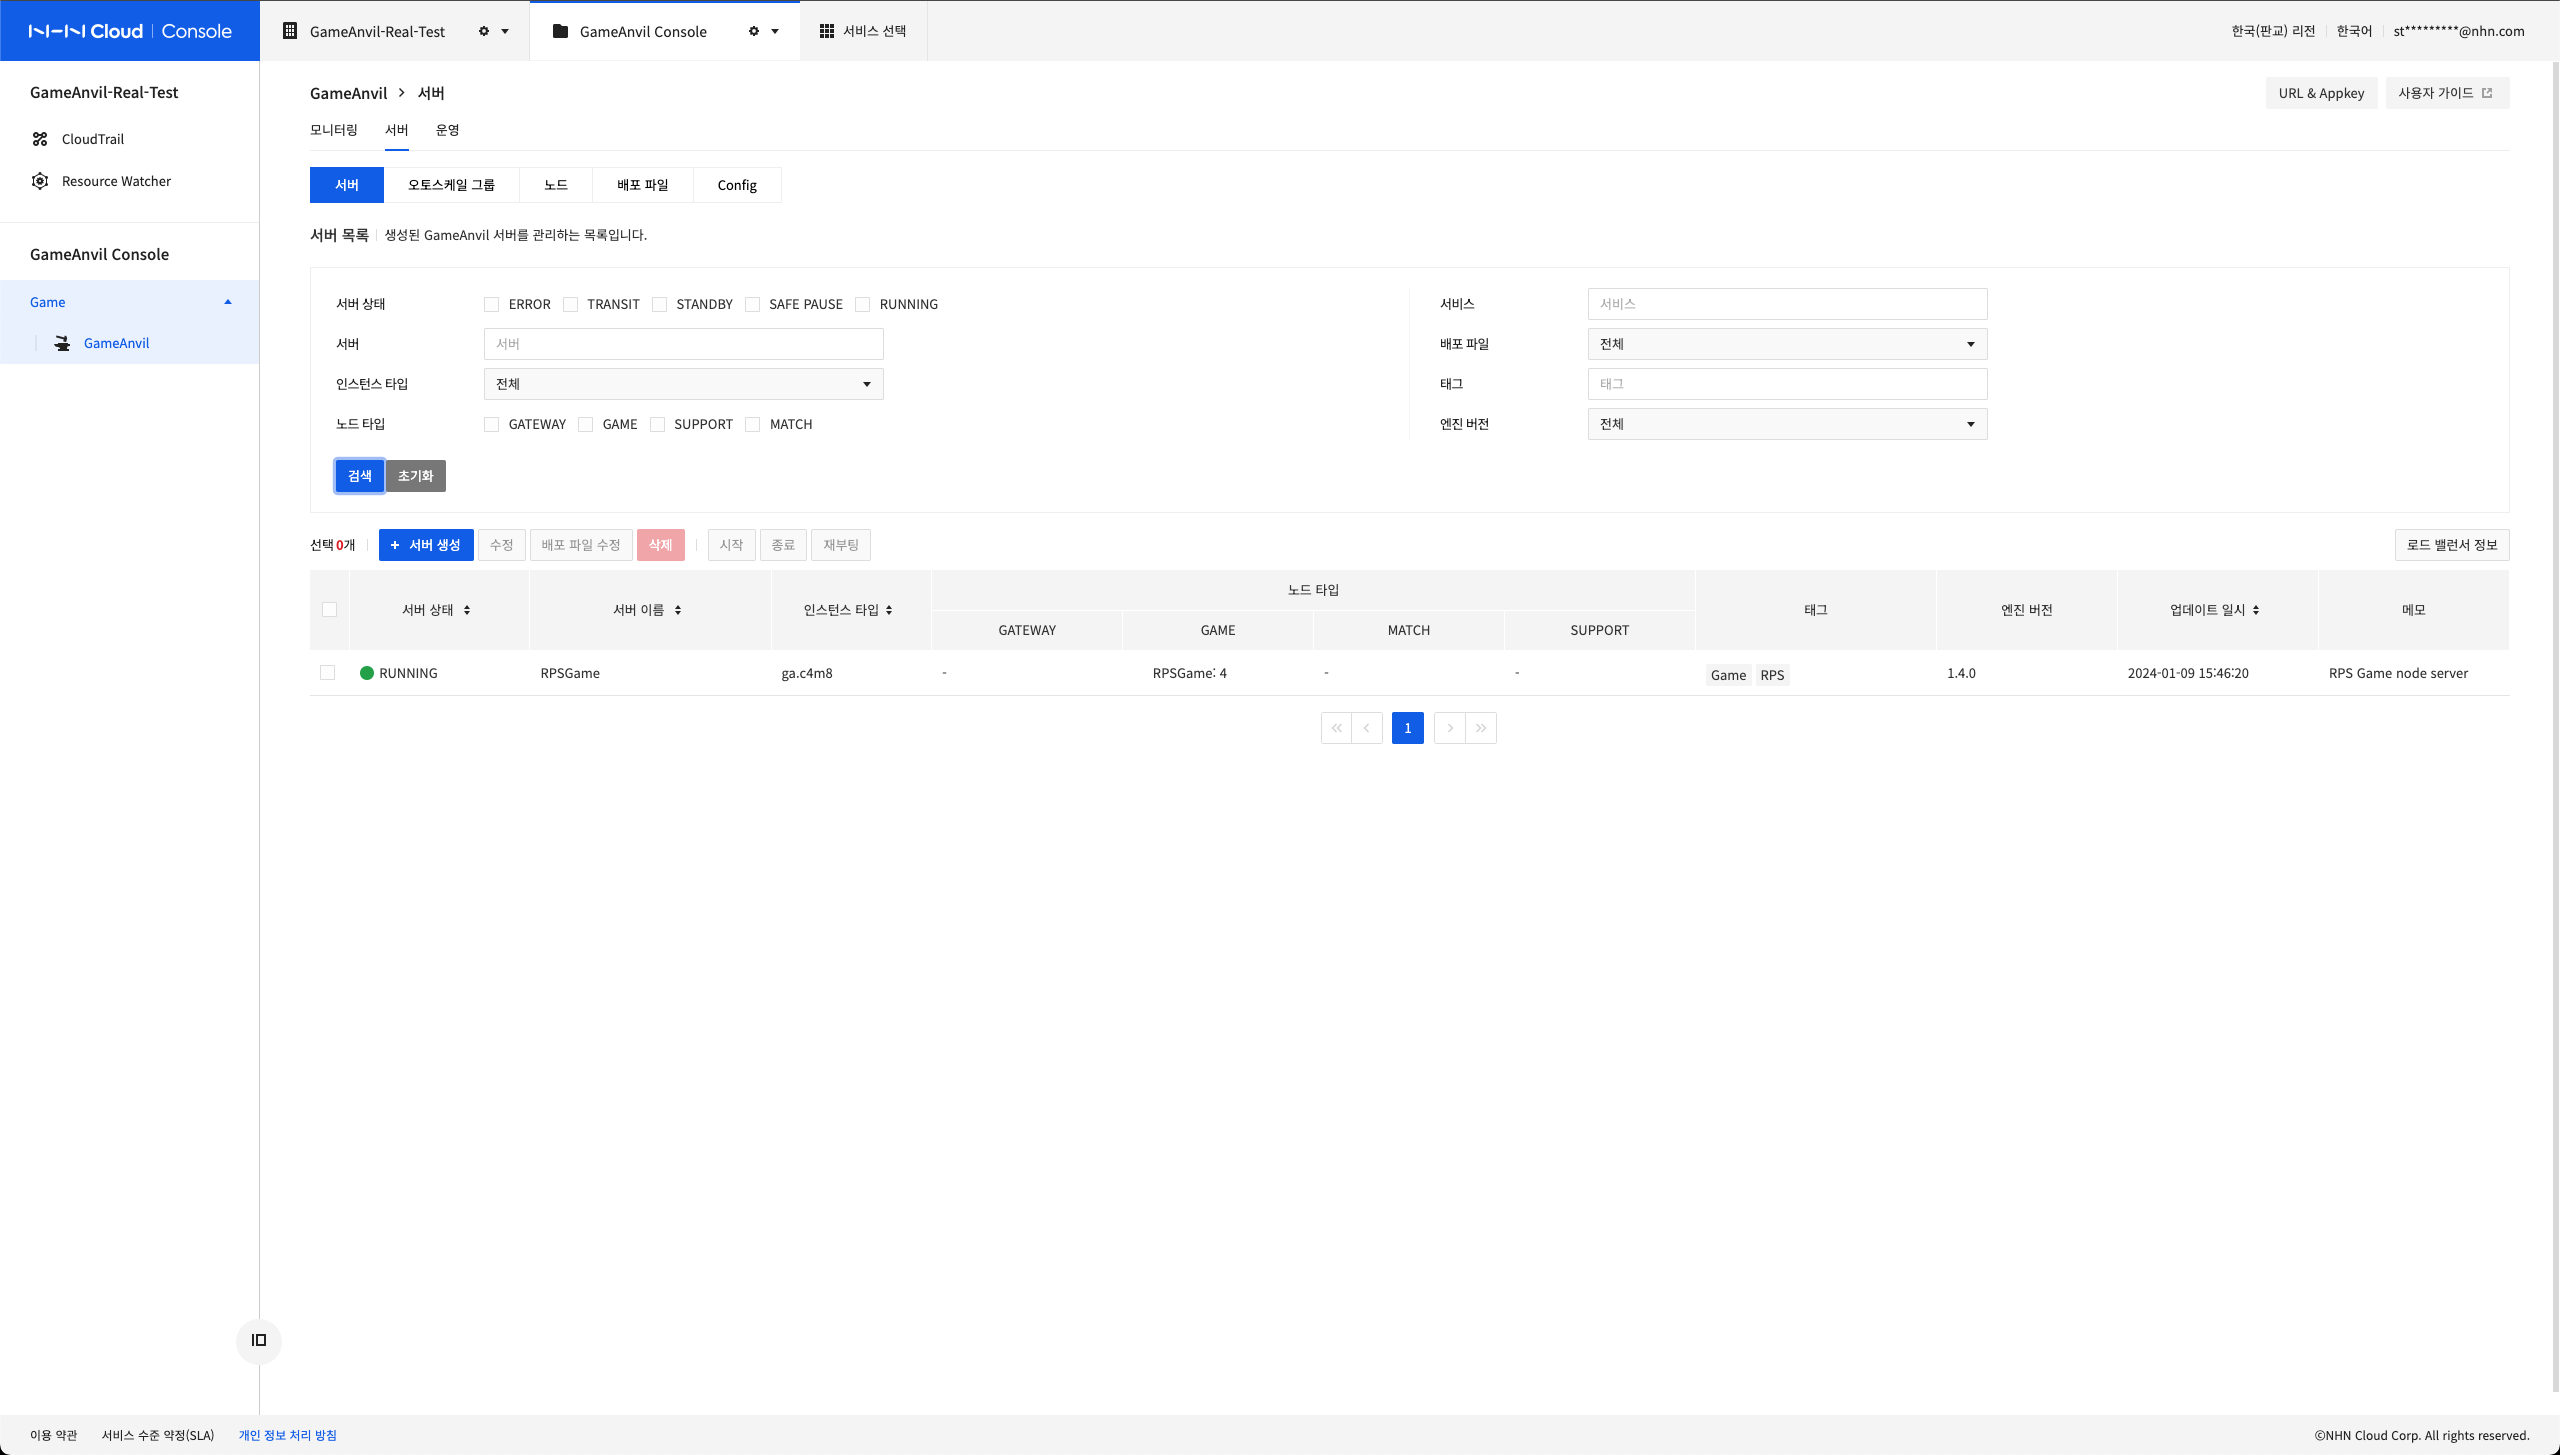
You can view server details by clicking on any item in the server list.
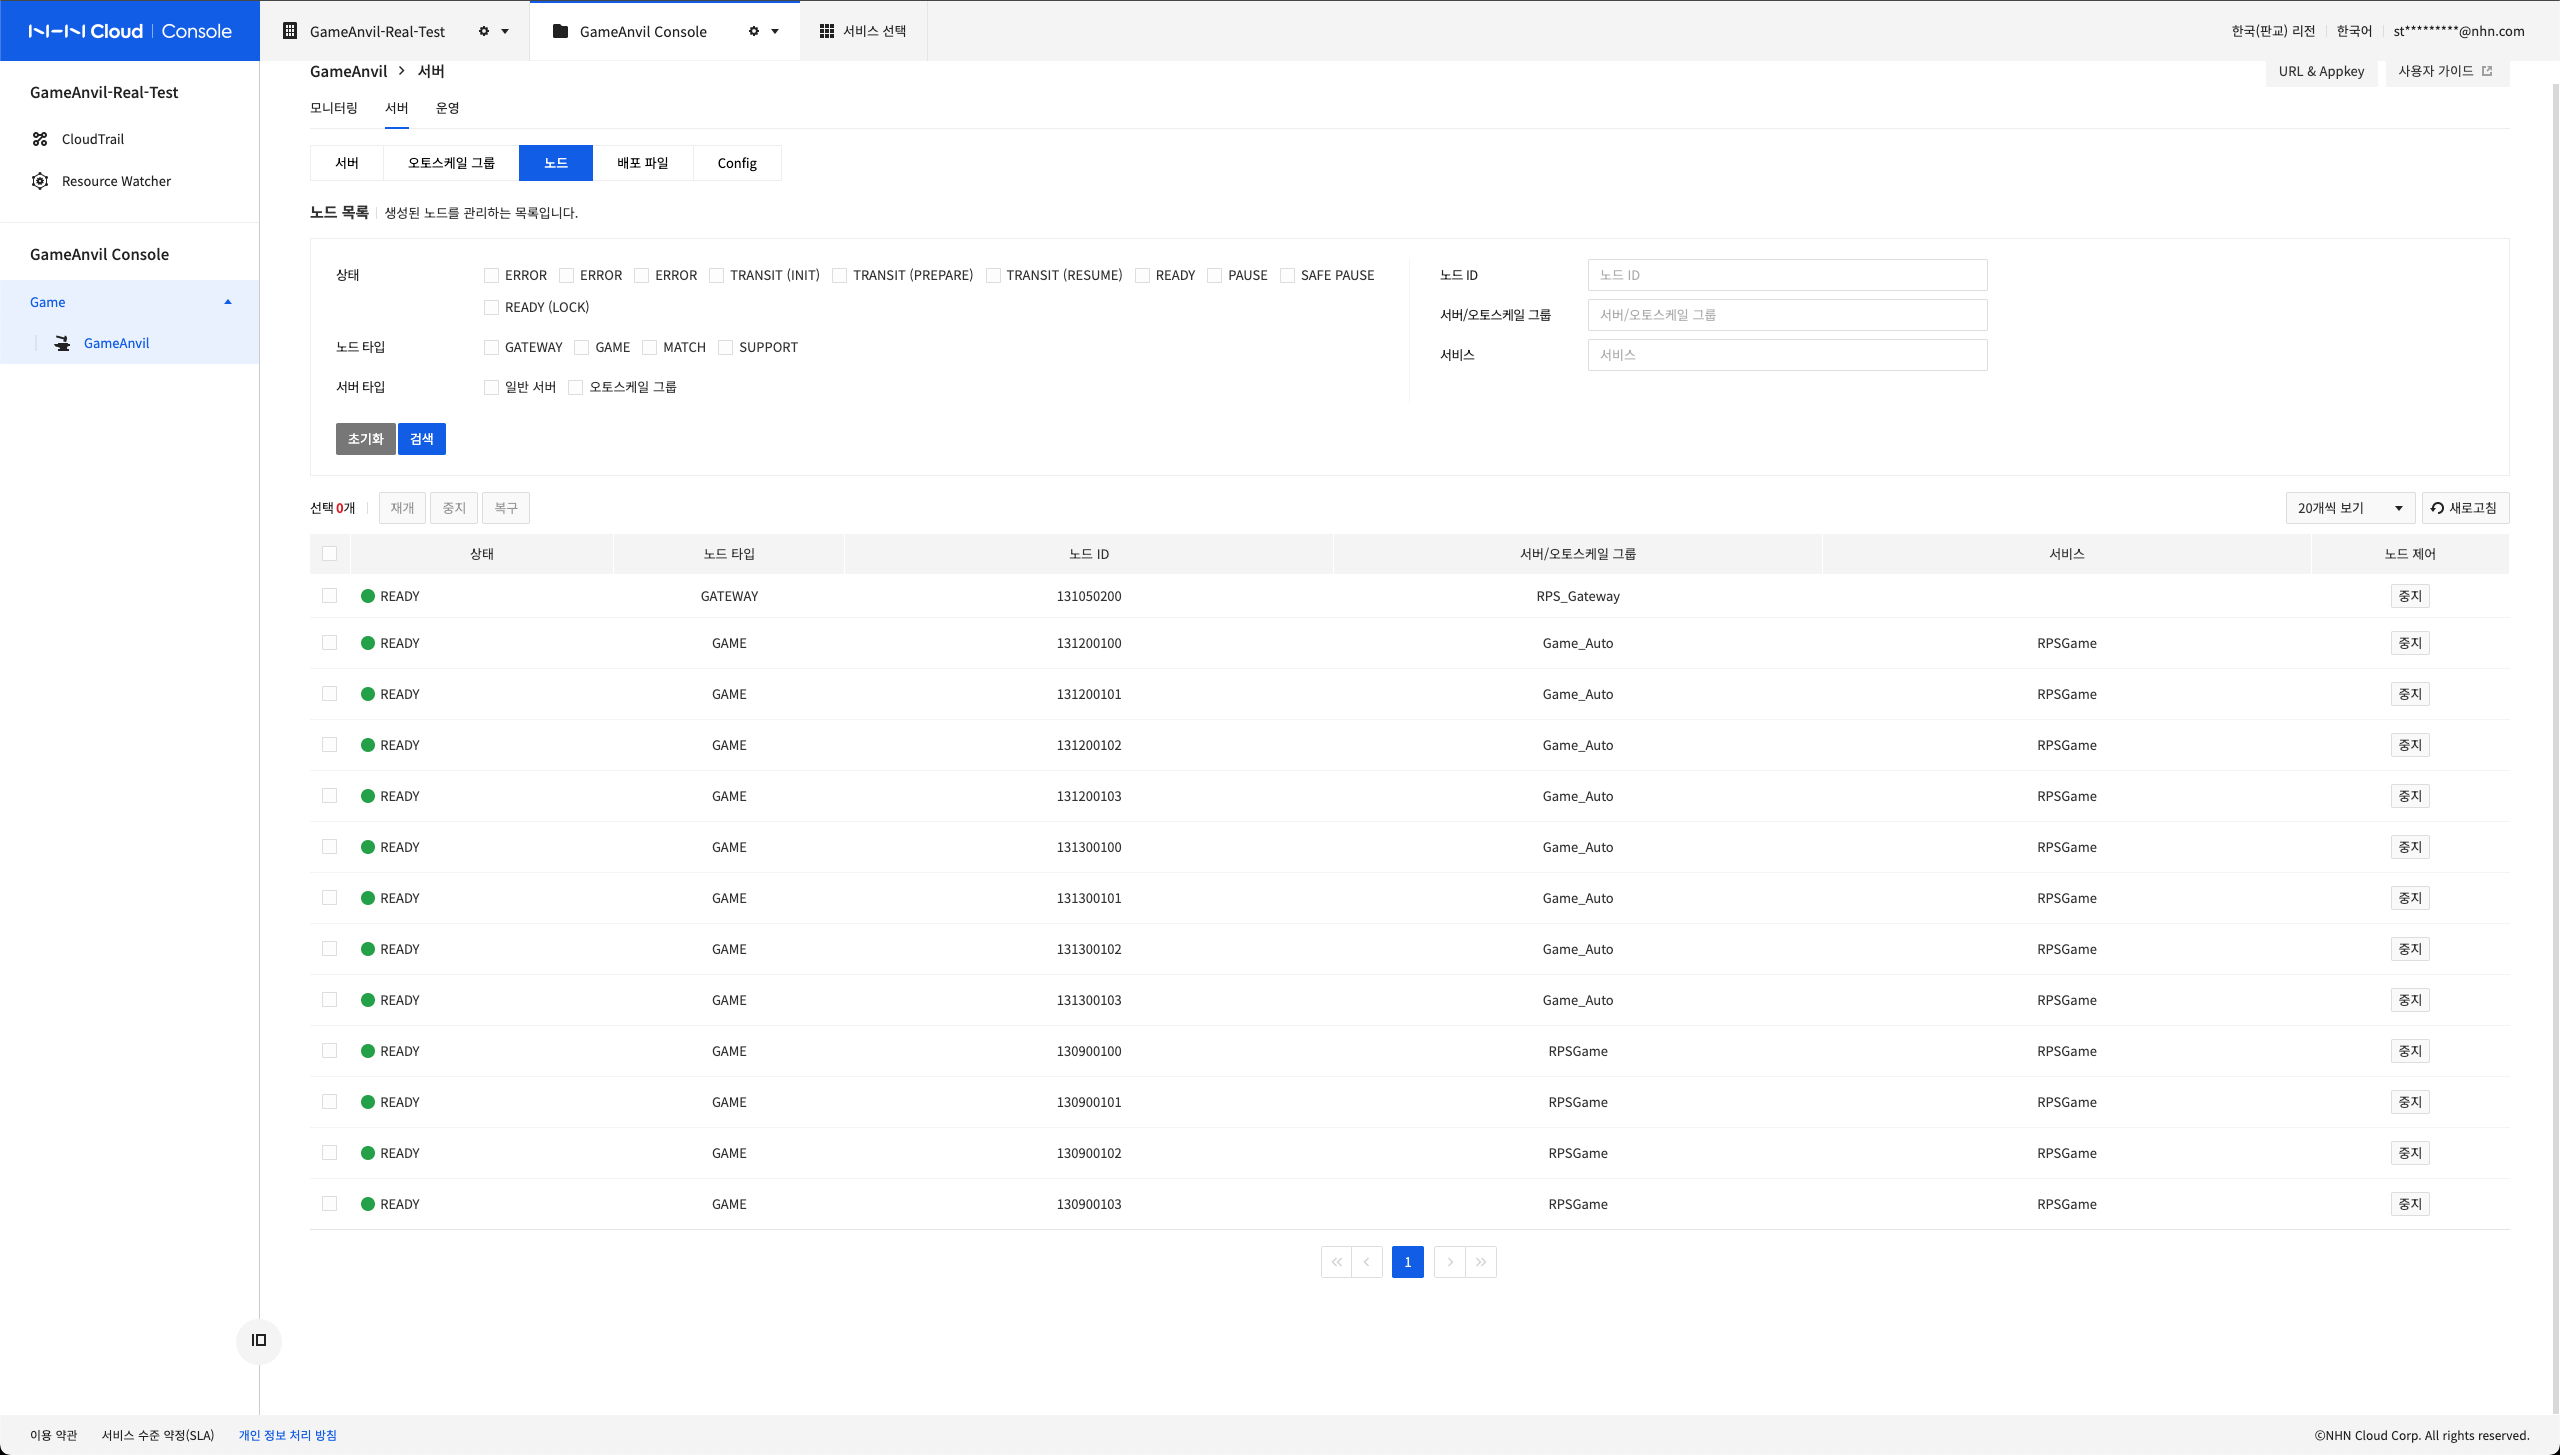
Check Created Node Information
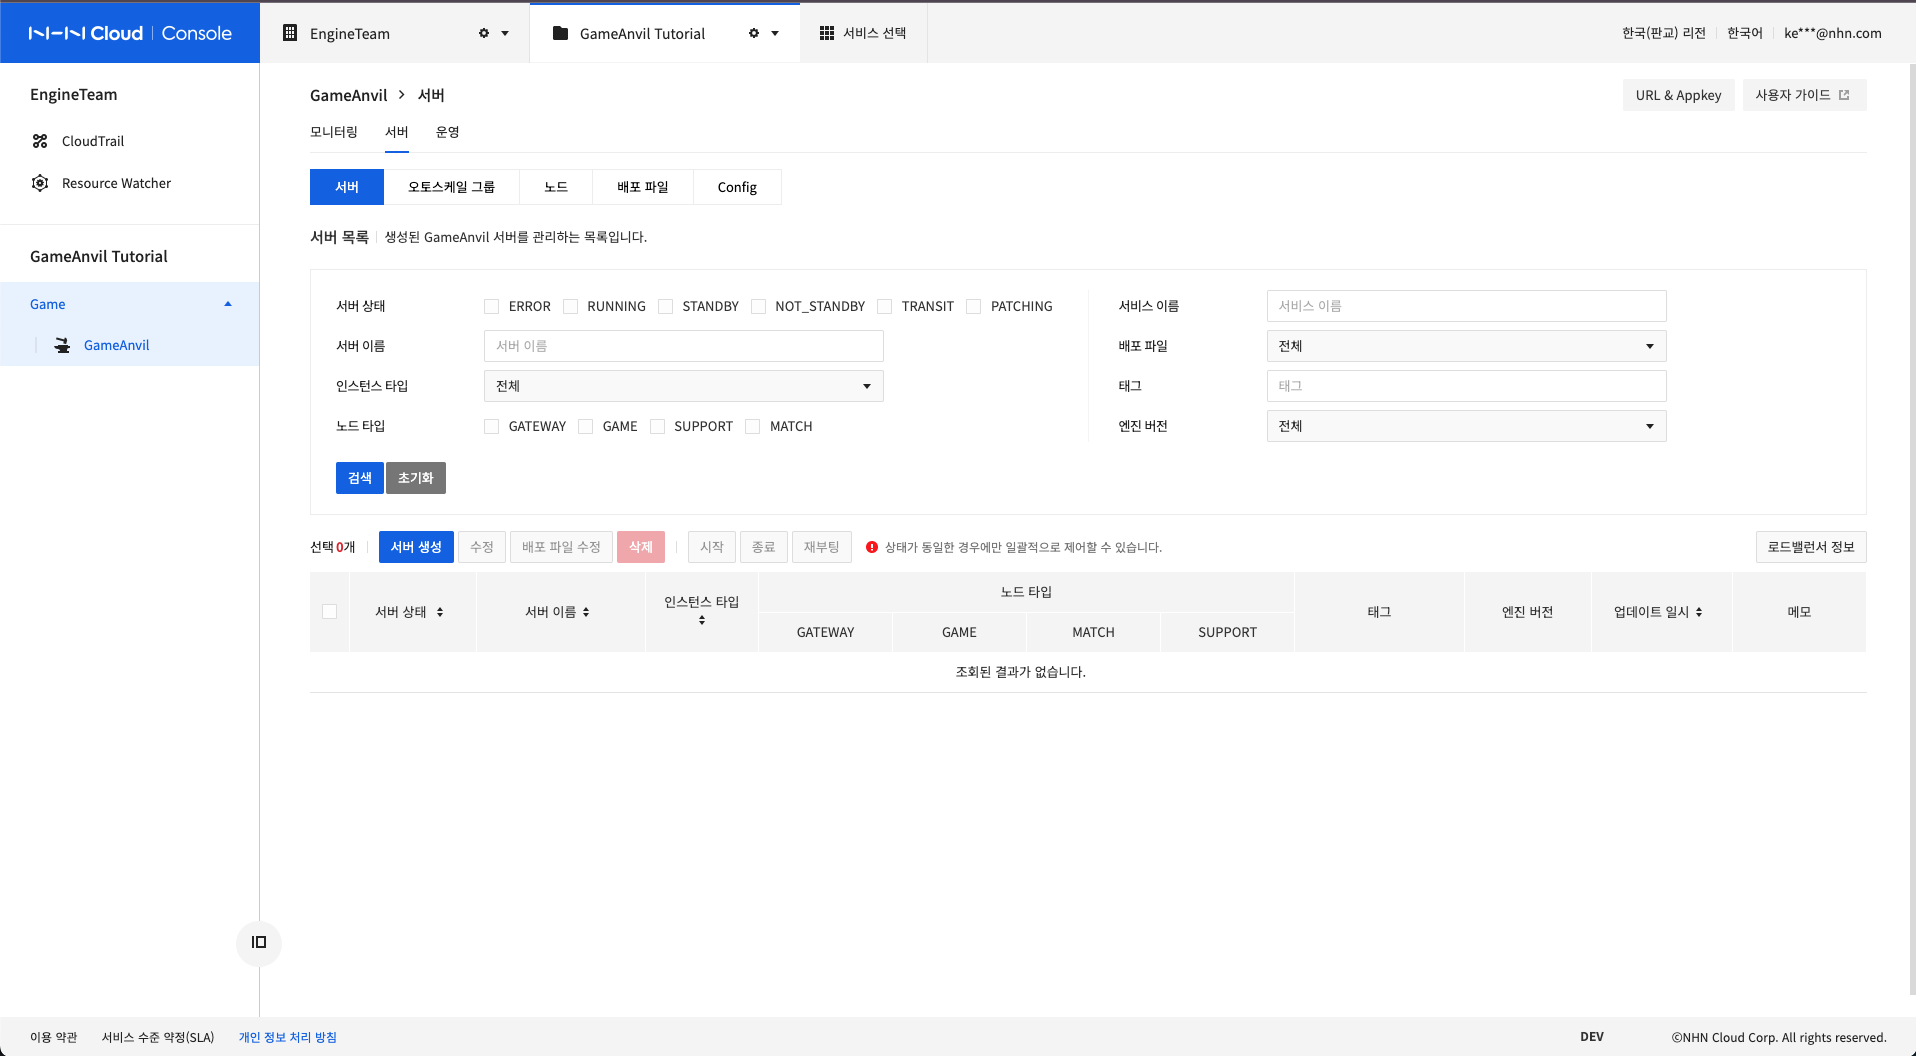
All node information that makes up the created server is available on the Node tab.
You can filter only arbitrary node information based on more detailed and clear information such as node ID as well as status, node type and server type.
Load Balancer
The GameAnvil service link load balancers to efficiently handle client connections. The points that clients can access among GameAnvil nodes are gateway nodes and support nodes. They can all consist of multiple instances. At this time, multiple access points must work with the load balancer for proper load balancing. The load balancer must also be connected to an externally accessible floating IP.
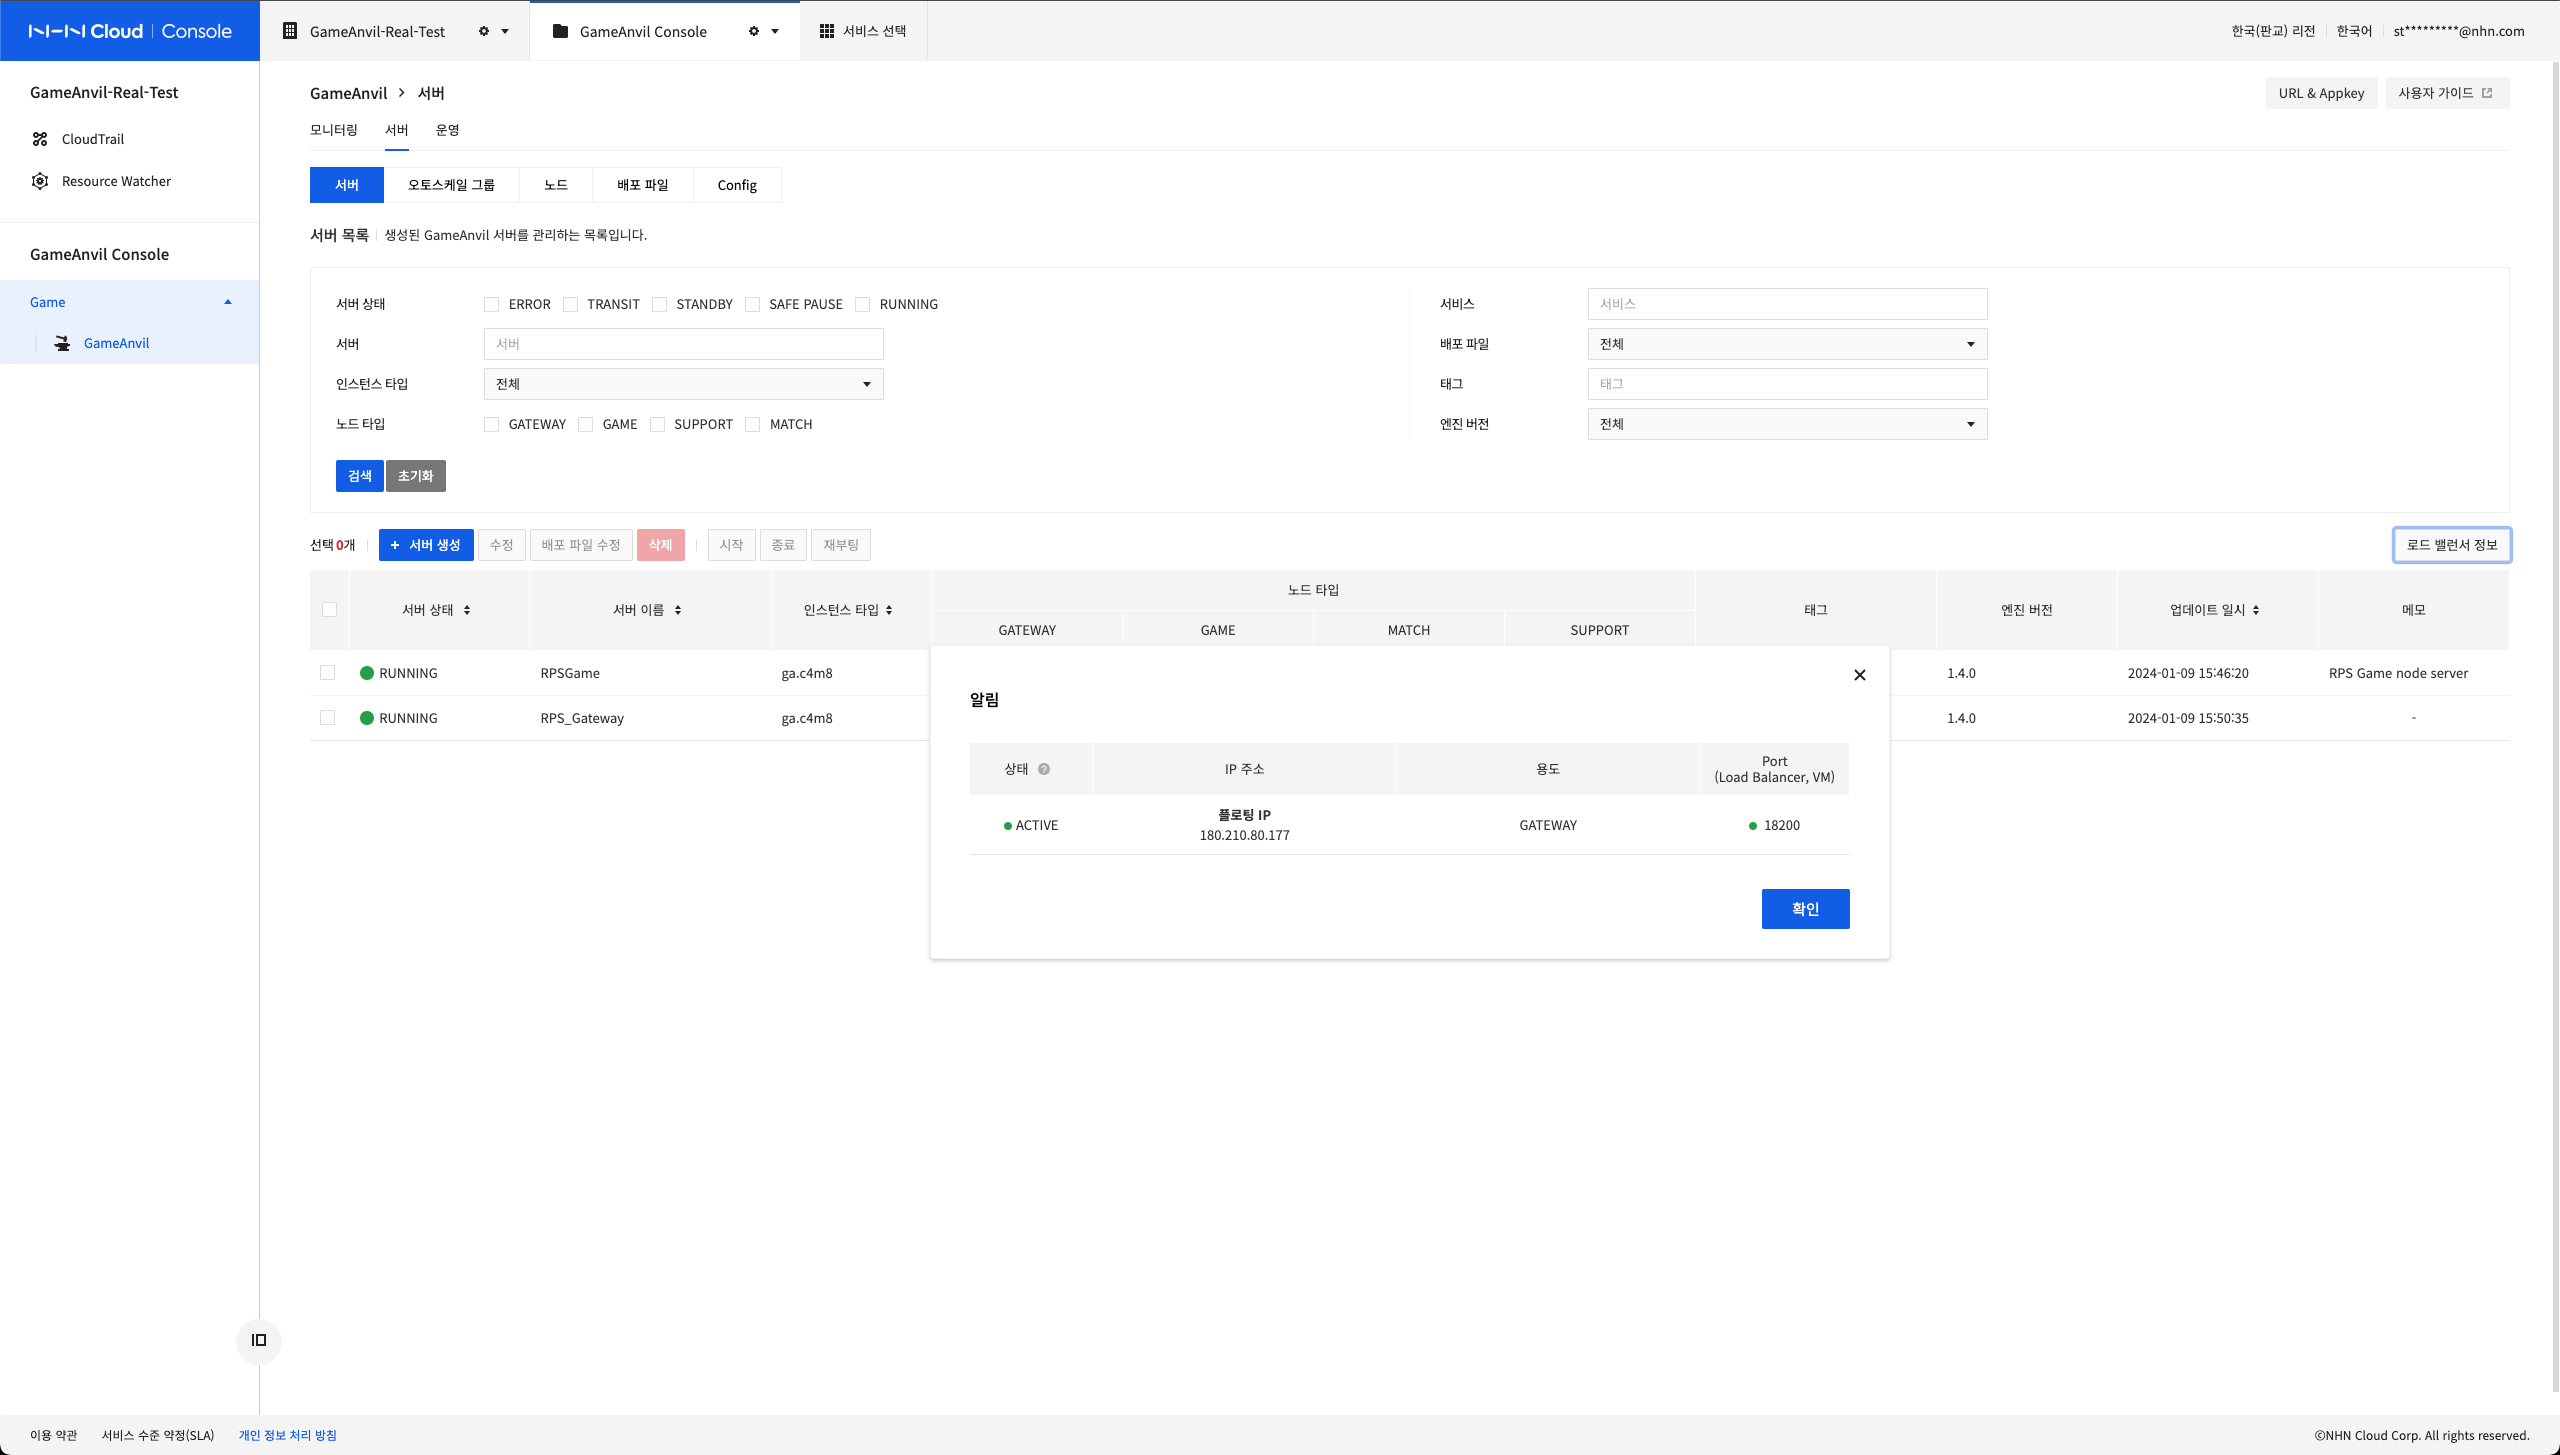
This series of processes is automatically handled by GameAnvil service and you can click on Load Balancer Information to view the connection information. Be careful not to unnecessarily pass it outside.