Game > GameAnvil > 서버 개발 가이드 > 메시지 핸들링
일반 메시지 처리
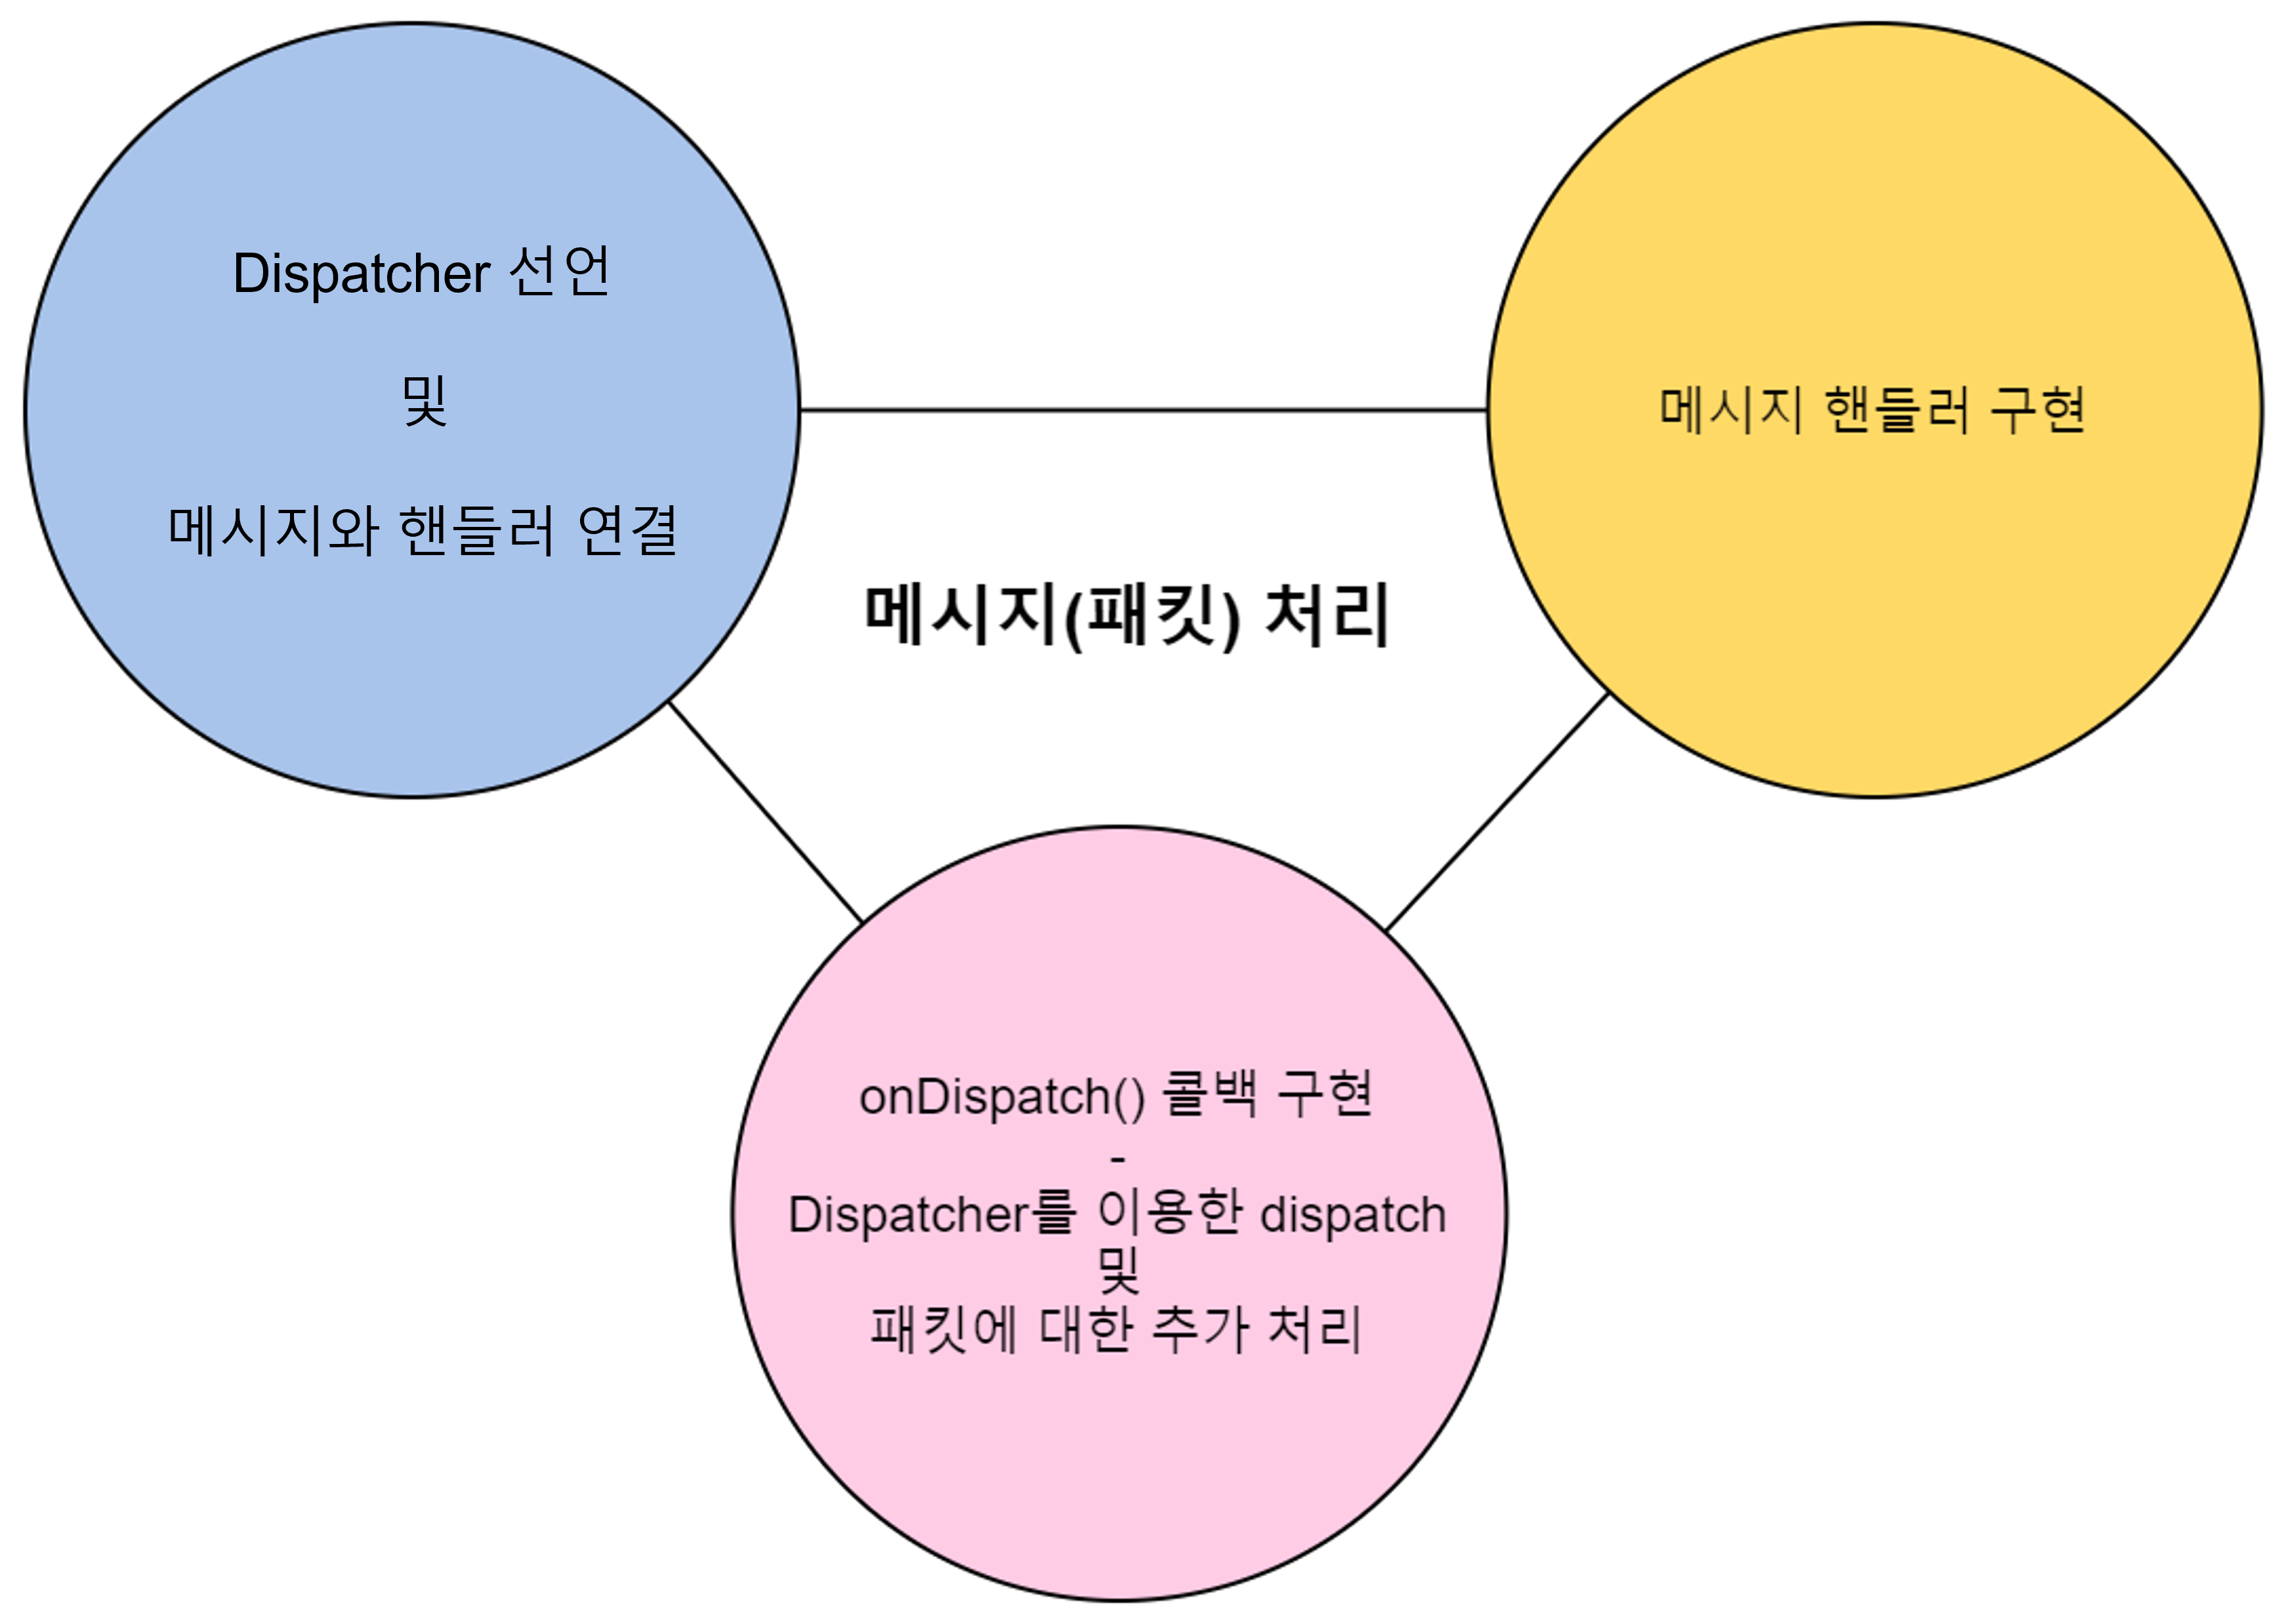
- GameAnvil의 메시지 처리는 위의 그림과 같이 크게 세 부분으로 나뉩니다. 이 세 부분이 서로 맞물려 메시지 처리 흐름을 만들게 됩니다.
- 이 중 onDispatch 콜백 구현은 엔진에서 자체적으로 하고 있으며 엔진 사용자는 Dispatcher의 선언과 메시지 핸들러를 구현하여 패킷을 처리합니다.
패킷 디스패처 생성 및 메시지와 핸들러 연결
우선 메시지 처리를 하기 위한 패킷 디스패처를 생성합니다. 이 디스패처는 해당 클래스에 대해 사용되므로 불필요한 리소스 낭비를 막기 위해 반드시 static으로 생성합니다.
// (패킷 디스패처 생성
private static final MessageDispatcher<MY_USER_CLASS> messageDispatcher = new MessageDispatcher<>();
이렇게 생성한 디스패처에 원하는 메시지와 핸들러를 연결합니다.
// 처리하고 싶은 메시지와 핸들러를 매핑
static {
    messageDispatcher.registerMsg(MyProto.MyMsg.class, _MyMsgHandler.class);
}
메시지 핸들러 구현
이제 해당 메시지 핸들러를 직접 구현합니다. 이때, GameAnvil은 엔진 내부는 물론이고 모든 샘플 코드에서 메시지 핸들러에 대해 _로 시작하는 네이밍을 사용합니다. 앞으로 등장하는 모든 예제 코드에서도 _로 시작하는 클래스는 모두 메시지 핸들러입니다. 가장 기본적인 형태의 메시지 핸들러는 아래와 같습니다. RECEIVER_CLASS는 해당 메시지를 받는 클래스를 의미합니다.
public class _MyGameMsg implements MessageHandler<RECEIVER_CLASS, MyProto.MyMsg> {

    private static final Logger logger = getLogger(_MyMsgHandler.class);

    @Override
    public void execute(RECEIVER_CLASS receiver, MyProto.MyMsg myMsg) throws SuspendExecution {
    }

}
예를 들어, 패킷 수신자가 GameUser라면 그 메시지 핸들러는 아래와 같습니다.
public class _MyGameMsg implements MessageHandler<GameUser, MyProto.MyMsg> {

    private static final Logger logger = getLogger(_MyMsgHandler.class);

    @Override
    public void execute(GameUser receiver, MyProto.MyMsg myMsg) throws SuspendExecution {
    }

}
getMessageDispatcher 콜백 구현
패킷 디스패처와 메시지 핸들러를 모두 구현하였습니다. 이제 엔진에서 처리할 패킷이 있을 때 디스패처를 넘겨 주기만 하면 됩니다.
public class GameUser {
    // .. 생략
    @Override
    public final MessageDispatcher<GameUser> getMessageDispatcher() {
        return packetDispatcher;
    }
    // .. 생략
}
지금까지 일반적인 패킷 처리에 대한 흐름을 살펴보았습니다. 그와 더불어 RESTful 요청에 대한 처리를 바로 달아서 살펴보도록 하겠습니다.
RESTful 요청 처리
패킷 디스패처는 두 가지가 존재합니다. 하나는 앞서 살펴본 일반적인 패킷 디스패처이고 다른 하나는 RESTful 요청을 처리하기 위한 디스패처입니다. 전체적인 사용법은 두 가지가 거의 동일합니다. 단, 이러한 RESTful 메시지 처리는 오직 SupportNode만 지원합니다.
REST 패킷 디스패처 생성 및 메시지와 핸들러 연결
다음의 예제 코드는 RESTful 요청을 처리하기 위해 이전과 다른 RestPacketDispatcher를 생성하고 있습니다. 또한 메시지 클래스가 아닌 URL 형태의 API를 핸들러에 연결하고 있습니다.
private static final RestMessageDispatcher<RECEIVER_CLASS> restDispatcher = new RestMessageDispatcher<>();

static {
    // path 와 method(GET, POST, ...) 조합으로 등록.
    restDispatcher.registerMsg("/auth", RestObject.GET, _RestAuthReq.class);
    restDispatcher.registerMsg("/echo", RestObject.GET, _RestEchoReq.class);
    restDispatcher.registerMsg("/testGET", RestObject.GET, _RestTestGET.class);
    restDispatcher.registerMsg("/testPOST", RestObject.POST, _RestTestPOST.class);
}
예제 코드와 같이 RestMessageDispatcher 사용하여 사용자가 원하는 RESTful API와 메시지 핸들러를 연결하고 있습니다.
핸들러 구현
RESTful 메시지 핸들러는 Packet 대신 RestObject가 인자로 전달되는 차이점 외에는 동일한 모습입니다.
public class _RestAuthReq implements RestMessageHandler<WebSupportNode> {
    private static final Logger logger = getLogger(_RestAuthReq.class);

    @Override
    public void execute(WebSupportNode node, RestObject restObject) throws SuspendExecution {
        ...
    }
}
RestMessageDispatcher 구현
RESTful 메시지 처리를 위한 getRestMessageDispatcher는 SupportNode만 지원합니다. restMessageDispatcher를 넘기도록 간단하게 구현할 수 있습니다.
@Override
public final RestMessageDispatcher<WebSupportNode> getRestMessageDispatcher() {
    return restMessageDispatcher;
}