Game > GameAnvil > 서버 개발 가이드 > Java 개발 환경 설정
IntelliJ 개발 환경 체크 포인트
IntelliJ에서 Java 버전을 8에서 11로 또는 11에서 8로 전환하거나, 최초 설정하는 과정에서 일부 설정이 누락되면 서버 빌드 및 실행이 의도한 대로 동작하지 않을 수 있습니다. 이 문서는 이러한 시행착오를 줄이고 쉽고 편하게 개발 환경을 확인할 수 있도록 가이드라인을 제공합니다.
JDK 설치
GameAnvil은 AdoptOpenJDK를 사용합니다. Java 버전은 8과 11을 지원합니다. 사용자는 원하는 JDK를 직접 설치하여 개발 환경을 구성할 수 있습니다. 특별한 이유가 없다면 AdoptOpenJDK를 사용할 것을 권장합니다.
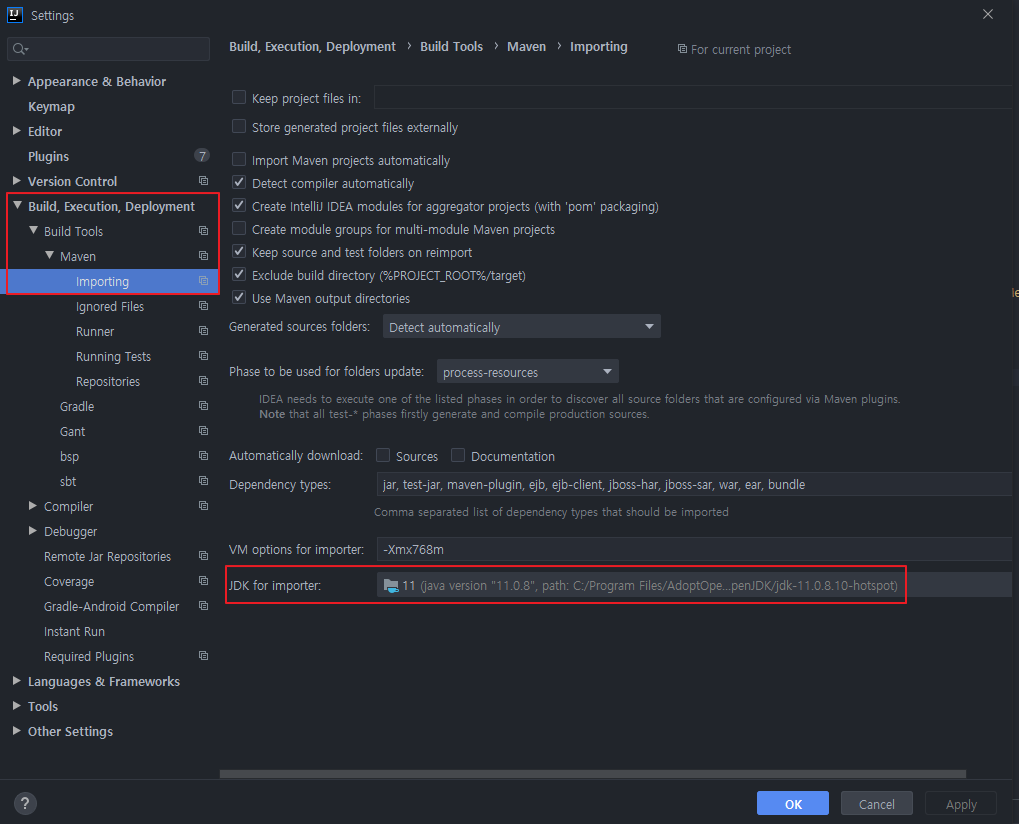
JDK for Importer
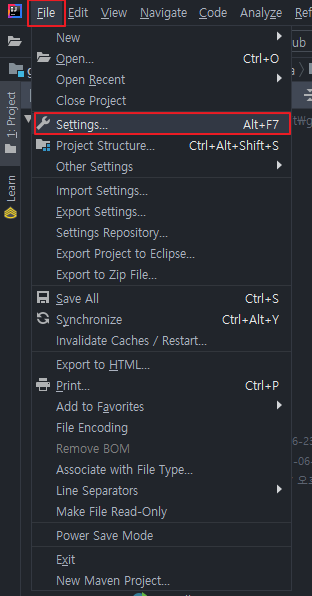
- File > Settings... 를 클릭합니다.
- Build, Execution, Deployment > Build Tools > Maven > Importing을 선택한 뒤 JDK for importer를 JDK 11로 설정합니다.
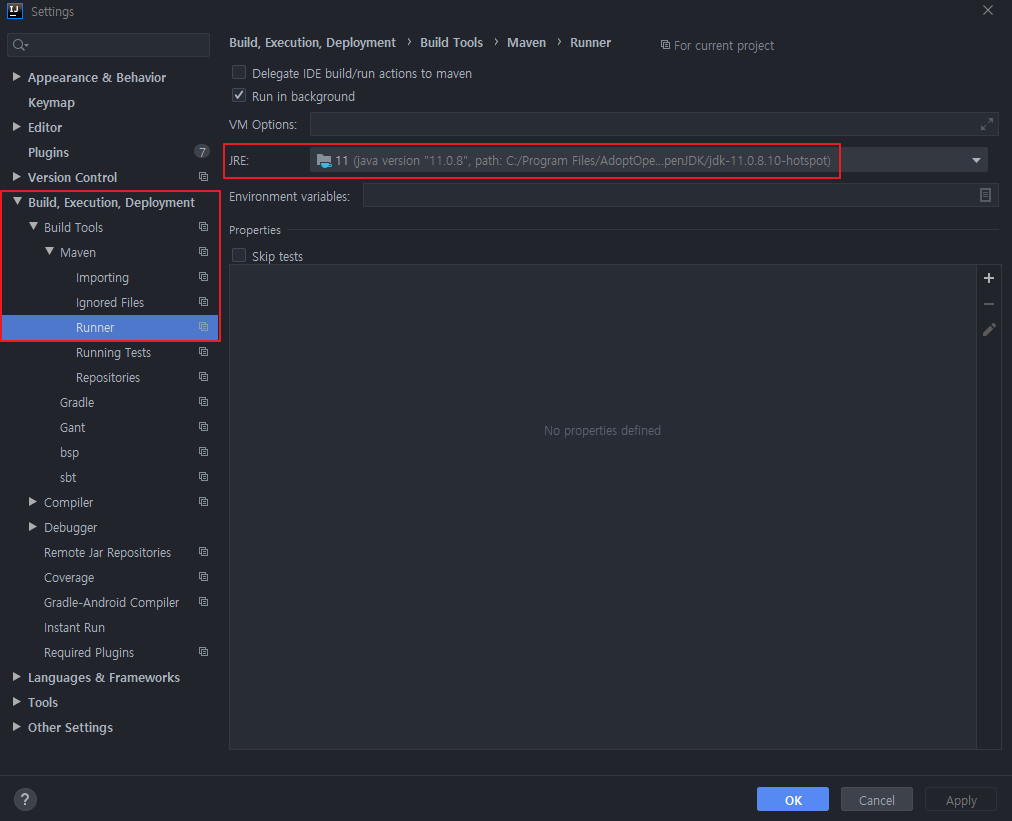
Maven Runner
- Build, Execution, Deployment > Build Tools > Maven > Runner를 선택한 뒤 JRE를 11로 설정합니다.
Project SDK, Language level 설정
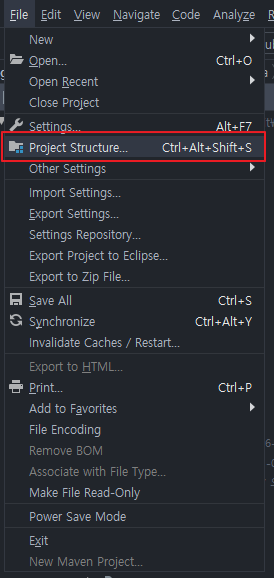
- File > Project Structure... 를 클릭합니다.
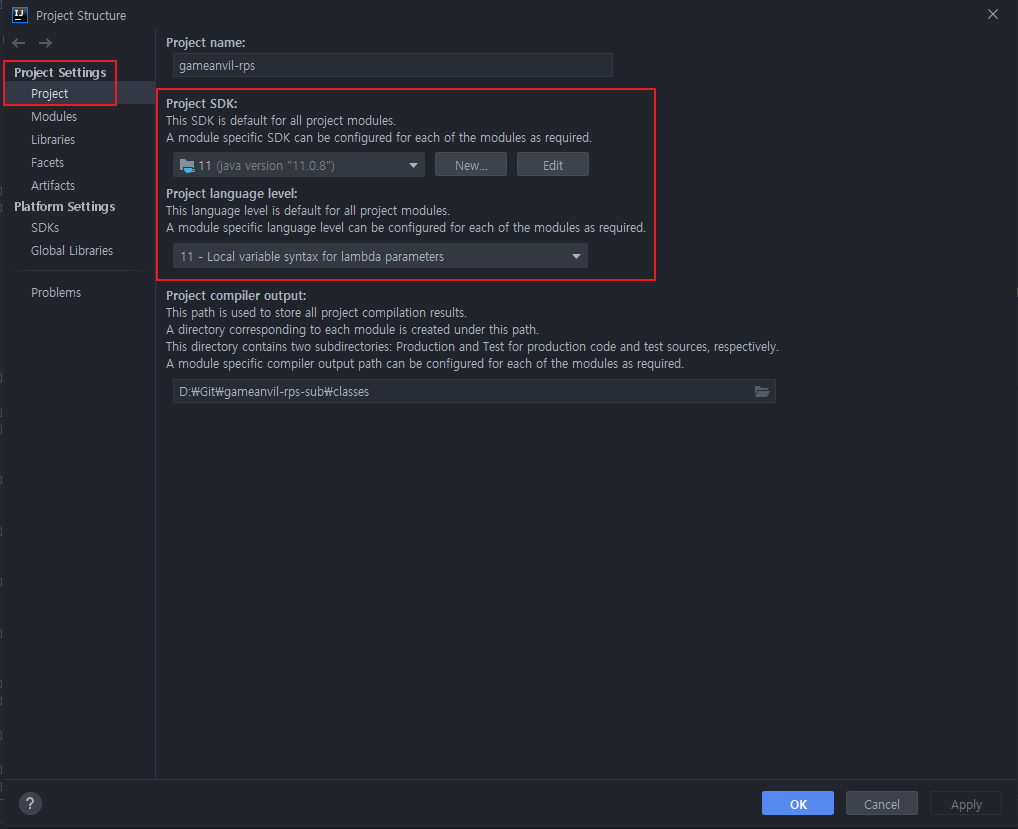
- Project Settings -> Project를 선택한 뒤 Project SDK 와 Project language level을 8 또는 11로 동일하게 설정합니다.
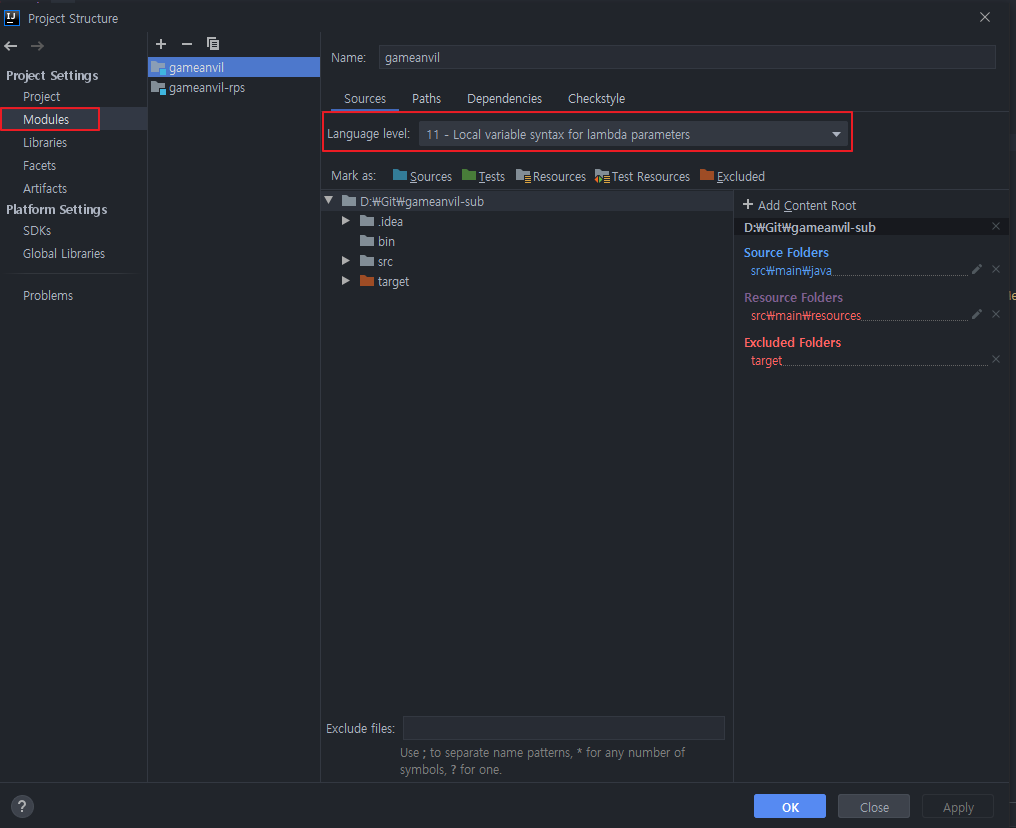
사용할 모듈의 Language level 설정
- Project Settings -> Modules를 선택한 뒤 사용자의 개발 프로젝트를 지정하여 Language level을 이전의 Project SDK의 그것과 동일하게 설정합니다.
Application configuration JRE 11 로 설정
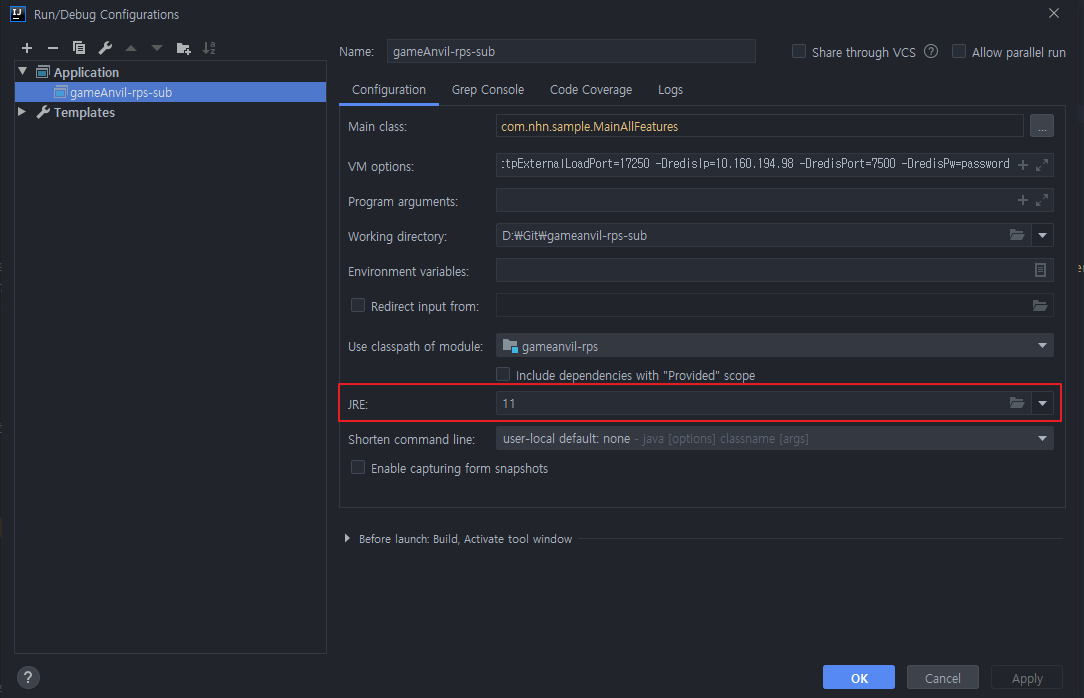
- 마지막으로 프로젝트의 구성을 편집합니다. 다음과 같이 사용자가 생성해 둔 구성을 편집하거나 새롭게 작성할 수 있습니다.
사용자의 Application을 선택하고 JRE 버전을 확인한 뒤 앞서 설정한 JDK 버전과 같은 값으로 설정합니다.
