Game > Gamebase > Store Console Guide > Epic Games Store Console Guide
This document explains how to integrate with the Epic Games Store (Epic). For more information on releasing products to Epic, see Epic Developer Resources .
Connect Epic Project
For information on integration, see the Epic Dev Portal. The environments Epic provides for product release are as follows.
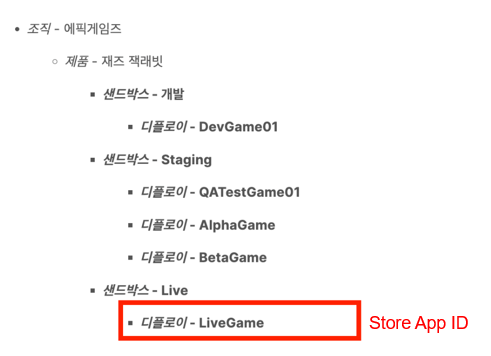
- Epic basically provides three sandboxes: Dev, Stage, and Live, and developers can create a deploy under each sandbox.
- Gamebase is mapped to deploys created in Epic's sandbox, and the Store APP ID to be used in app information is the Deploy ID.
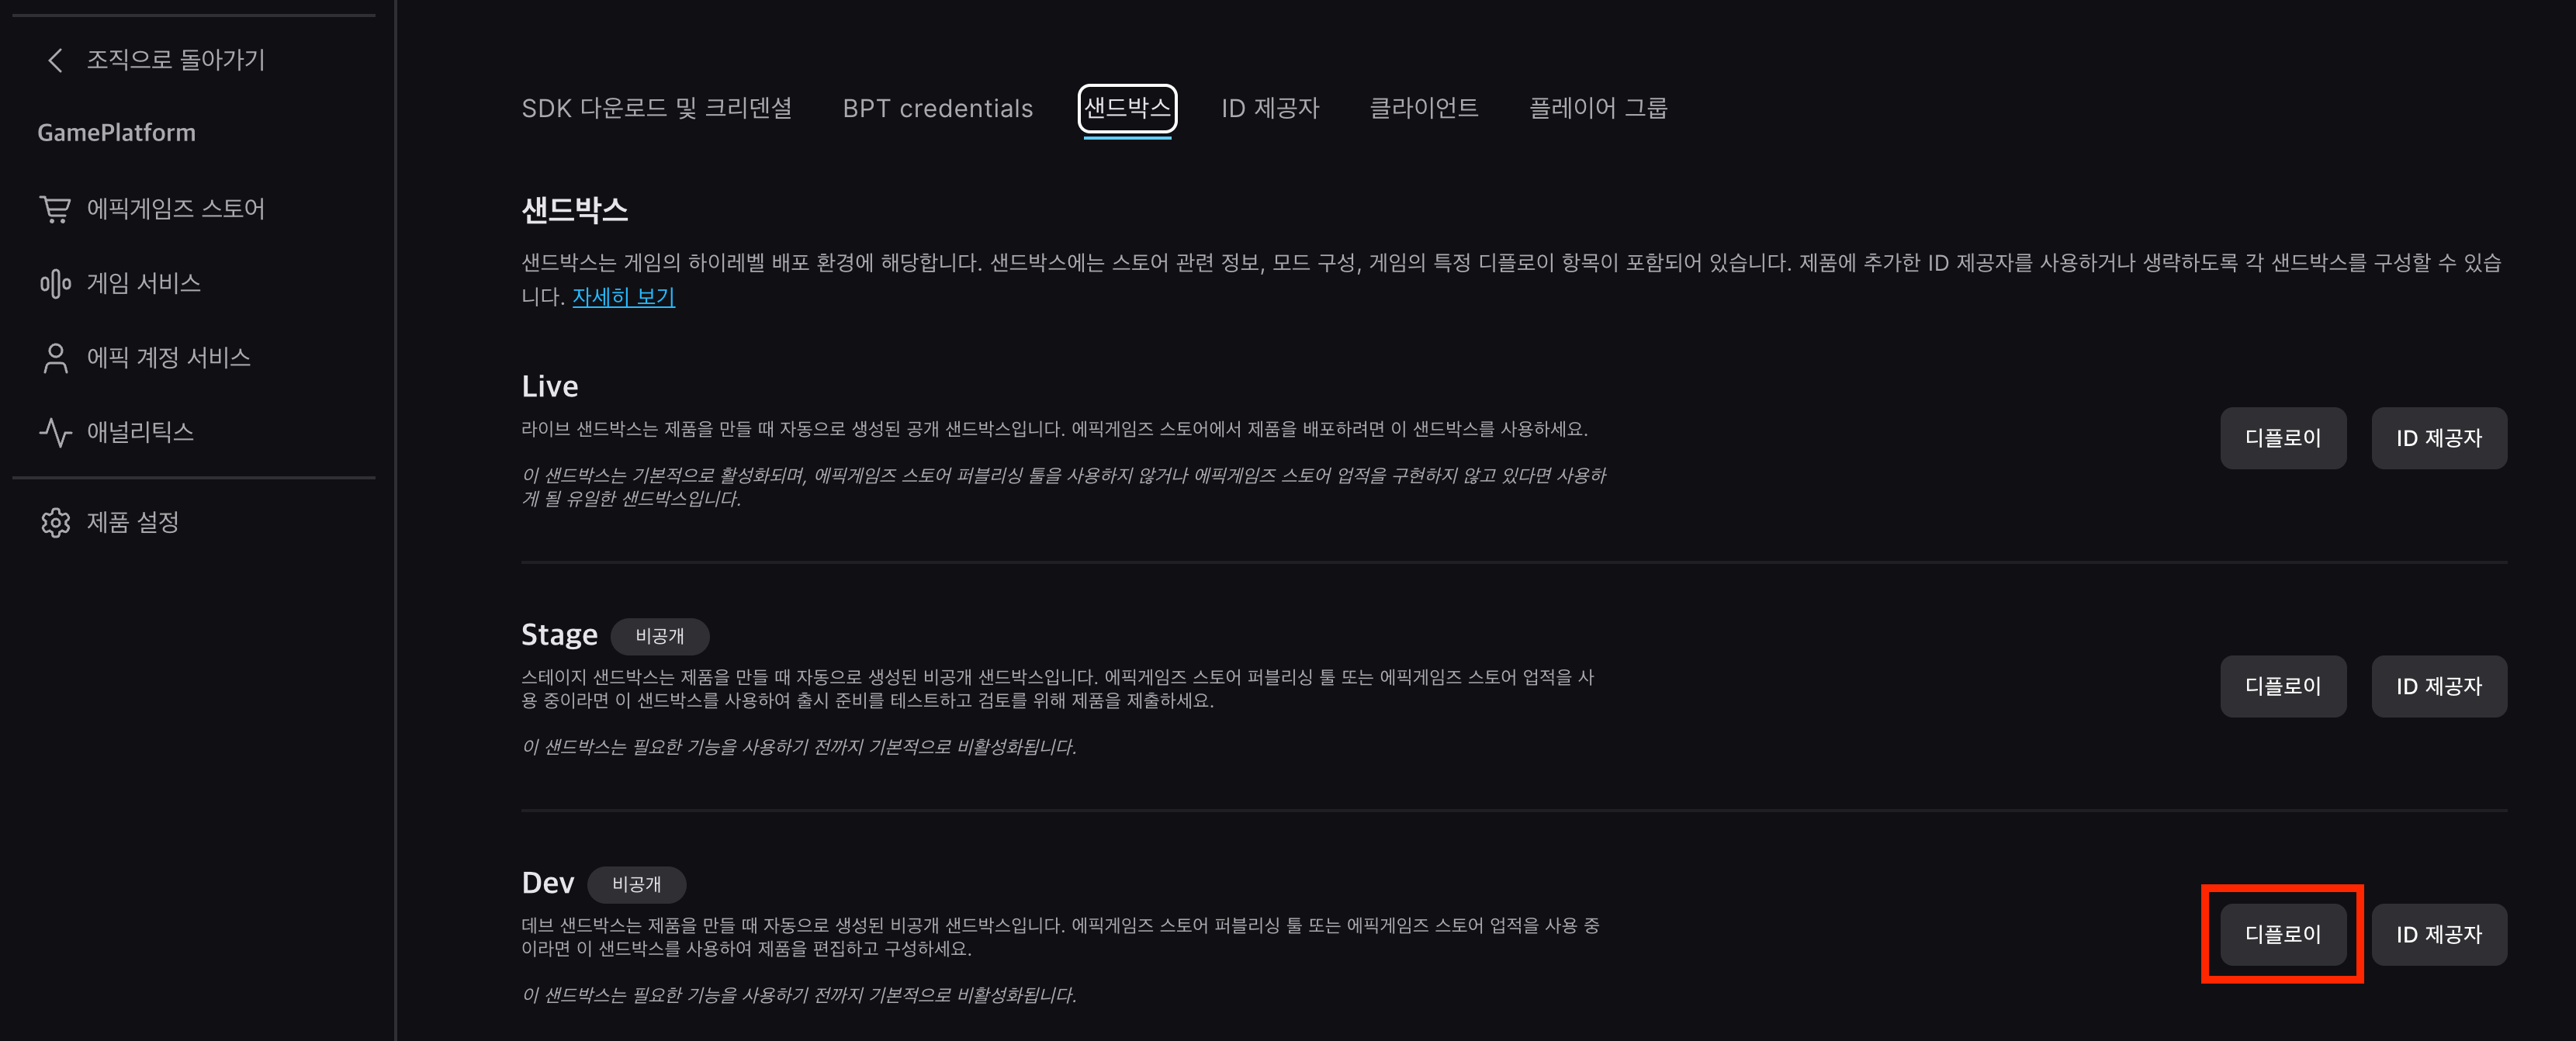
Create Deploy
- Create a deploy in the Product Settings > Sandbox menu.
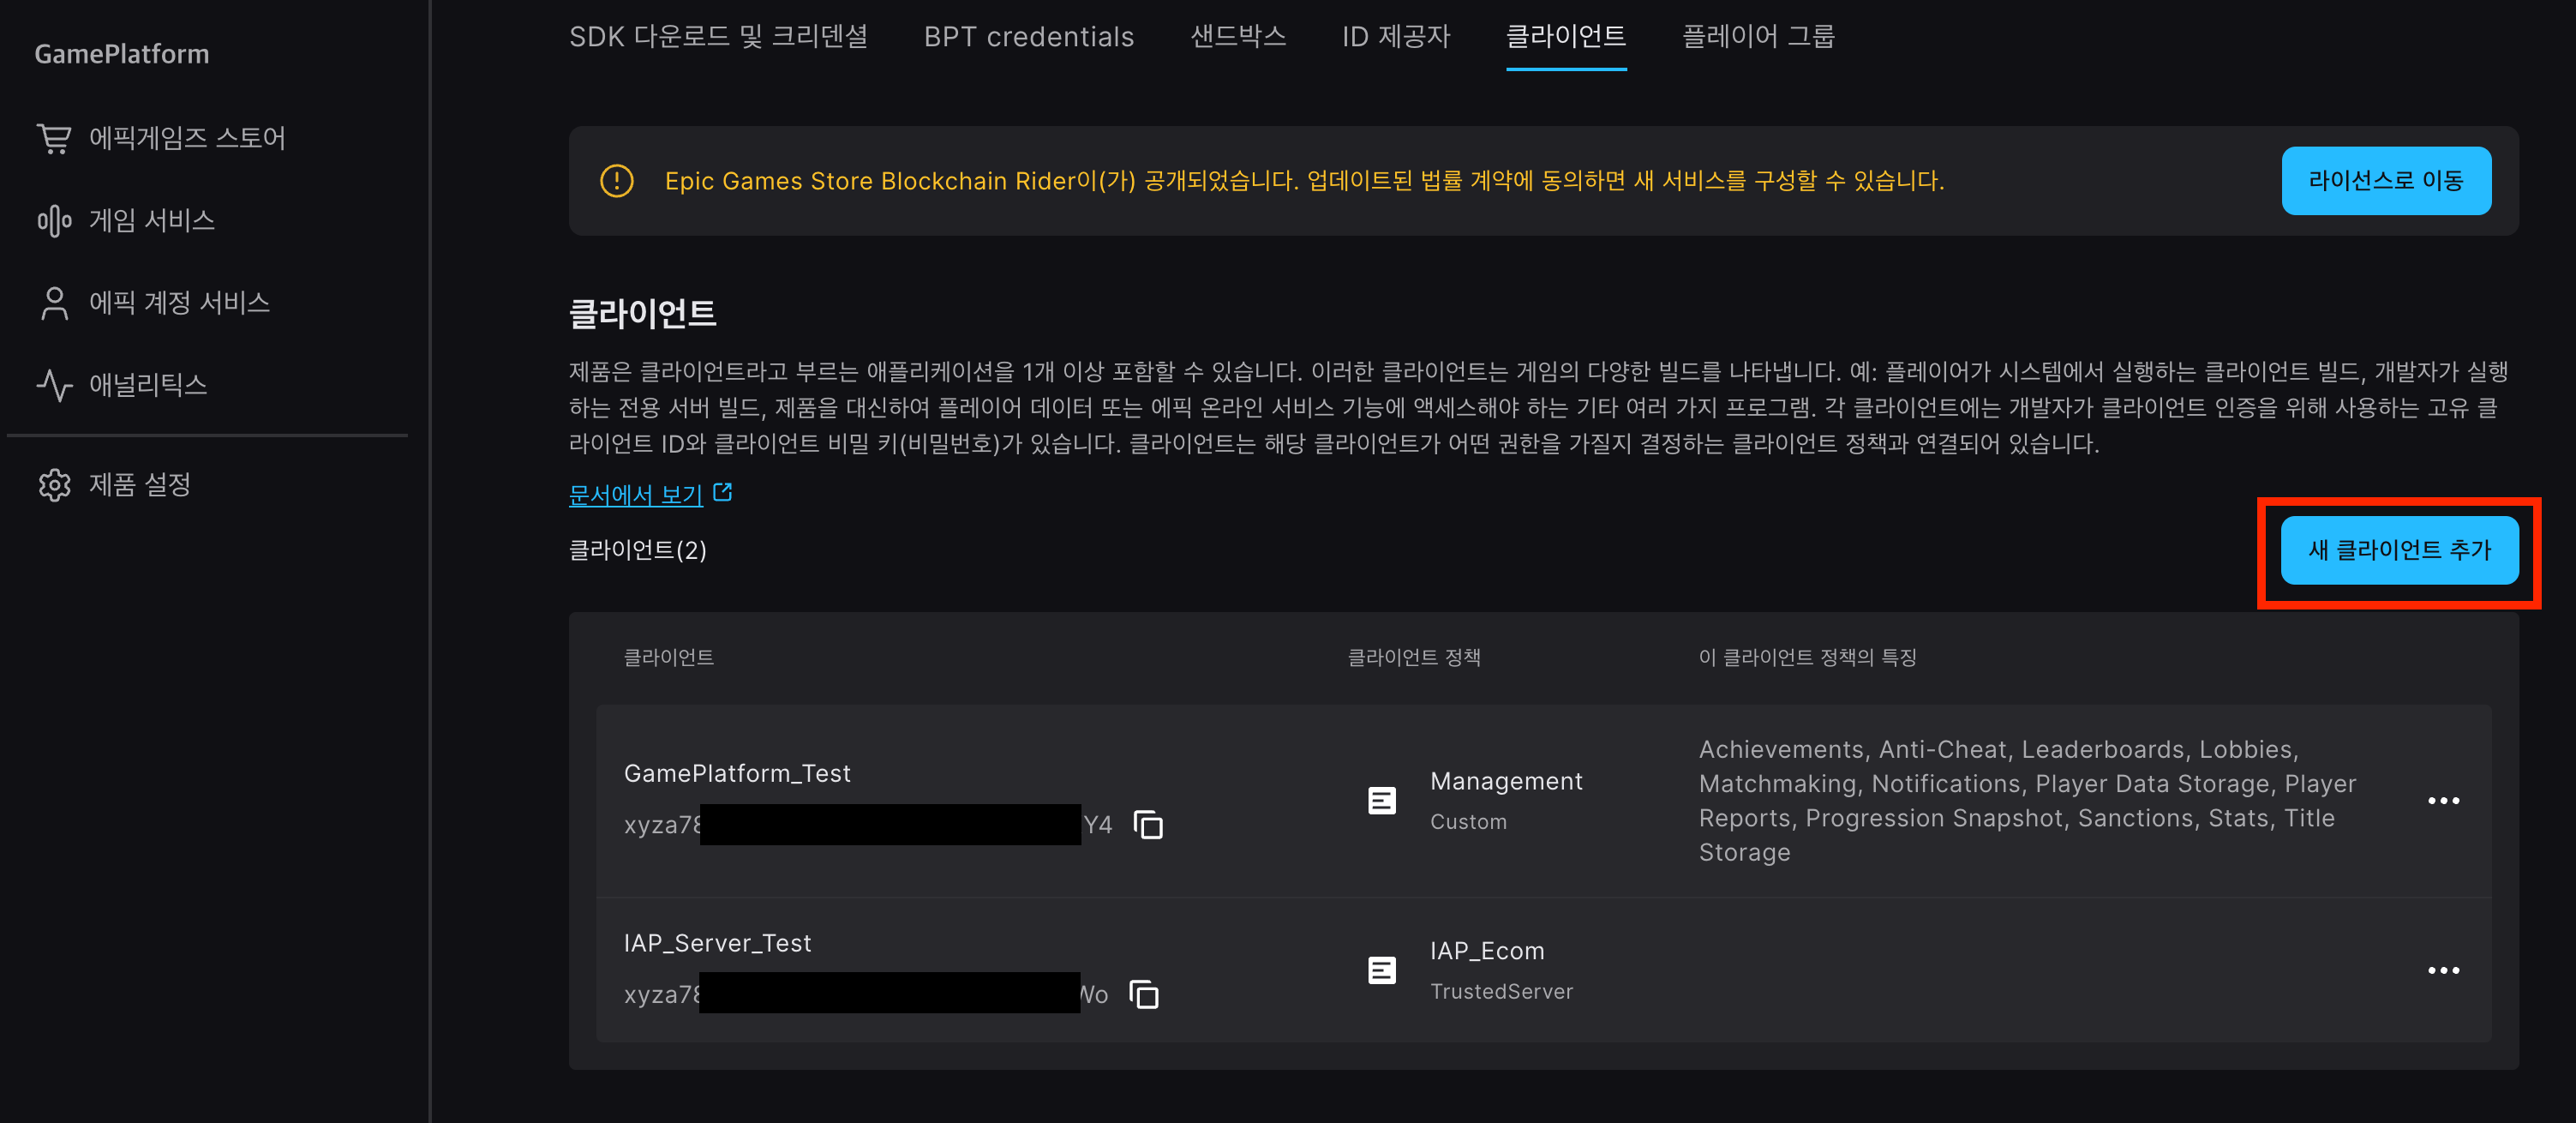
Create Client
- In order for Gamebase to communicate with Epic, Epic's OAuth client is required.
-
You can create a client to use for Gamebase in the Product Settings > Client menu.
Create a client policy first before creating a client.
-
To create a client, must create the policy to be applied to the client first.
- Set the client policy name as a random name.
- For the client policy type, select TrustedServer.
- The feature is not required by Gamebase, so it is not selected.
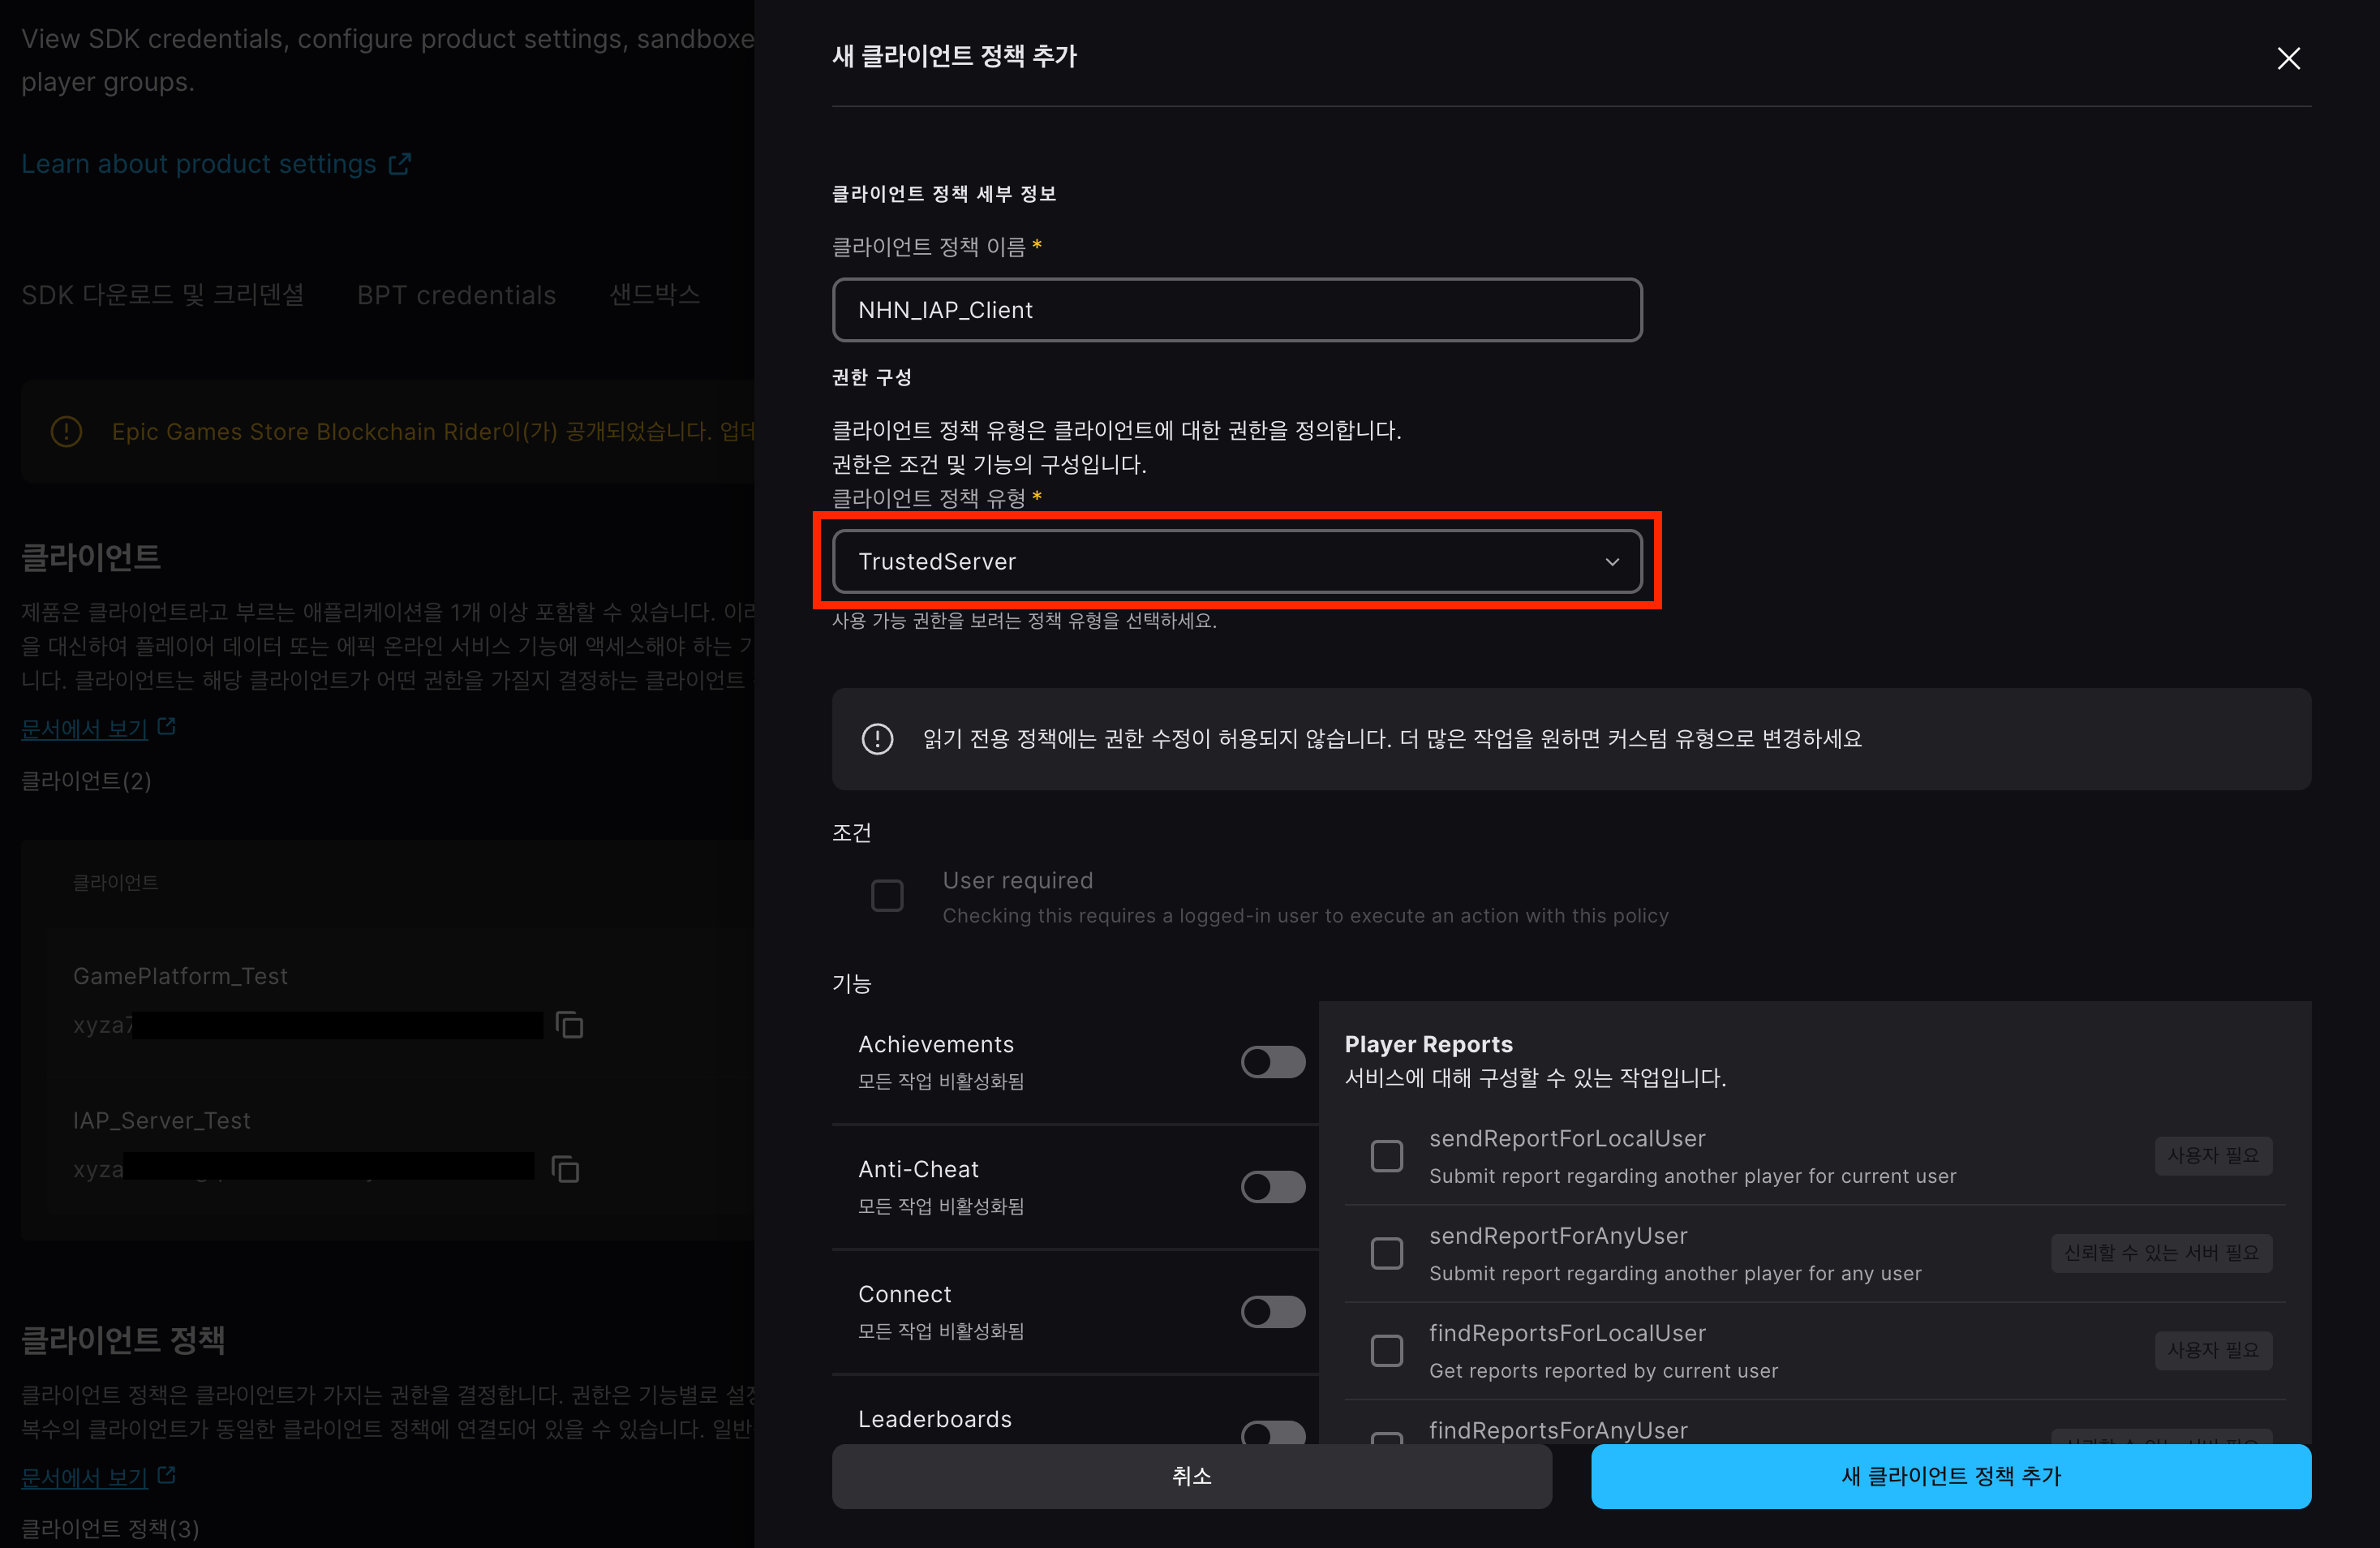
- After adding the client policy, create a client.
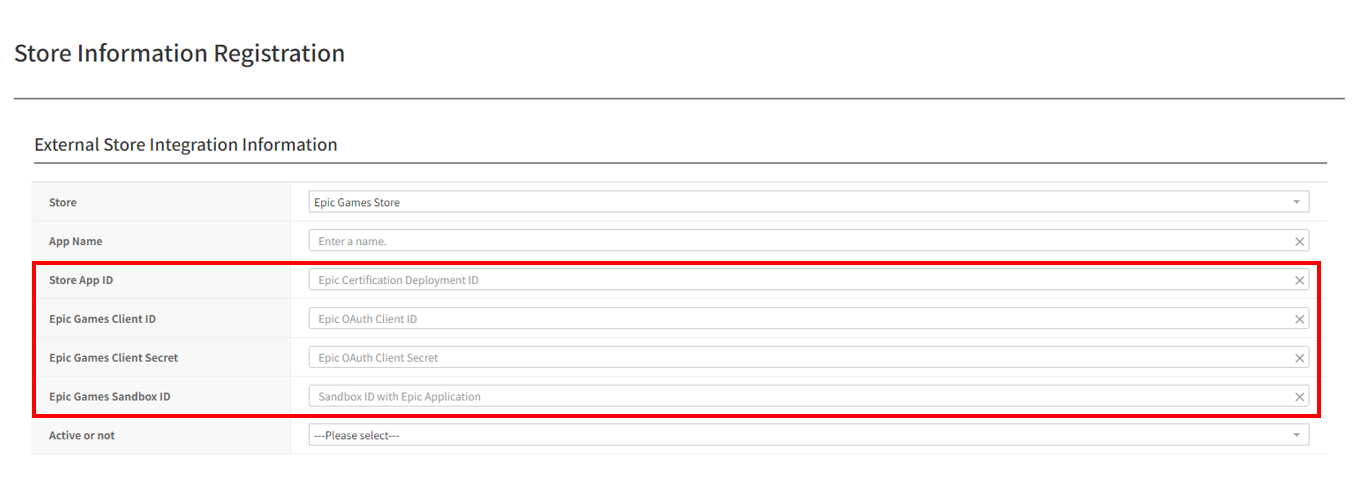
Check Deploy and Client Information
- The created deploy and client information can be checked in the Product Settings > SDK Download and Credentials menu.

- Register the deploy ID, client ID, client secret key, and sandbox ID in the Gamebase store information.
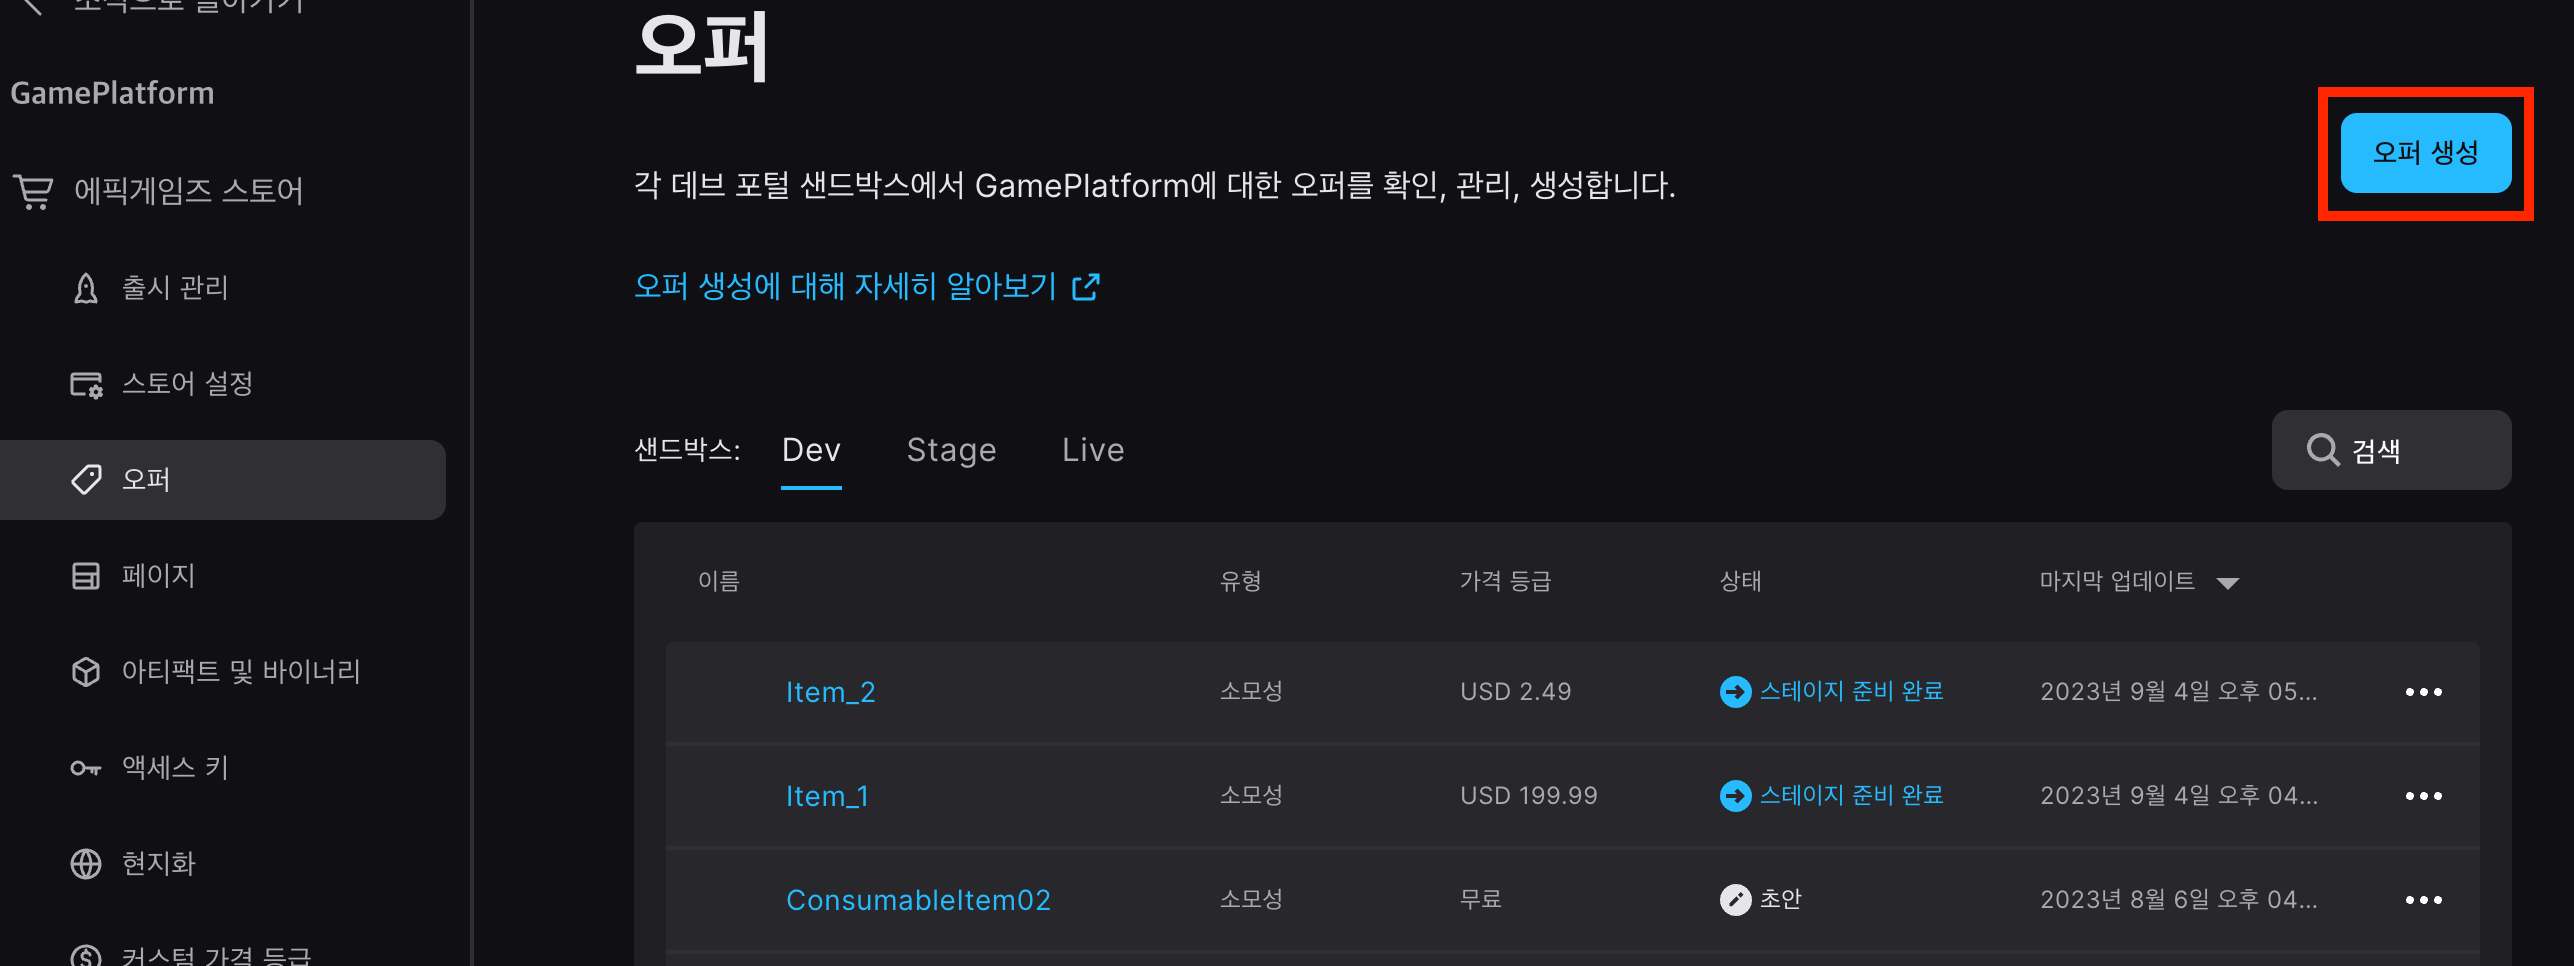
Connect Item (Offers)
- Epic items are managed through offers.
- Offers are divided into ones you own, such as editions and demos, and consumable offers you consume after purchase.
- In Gamebase, only consumable offers are managed as items.
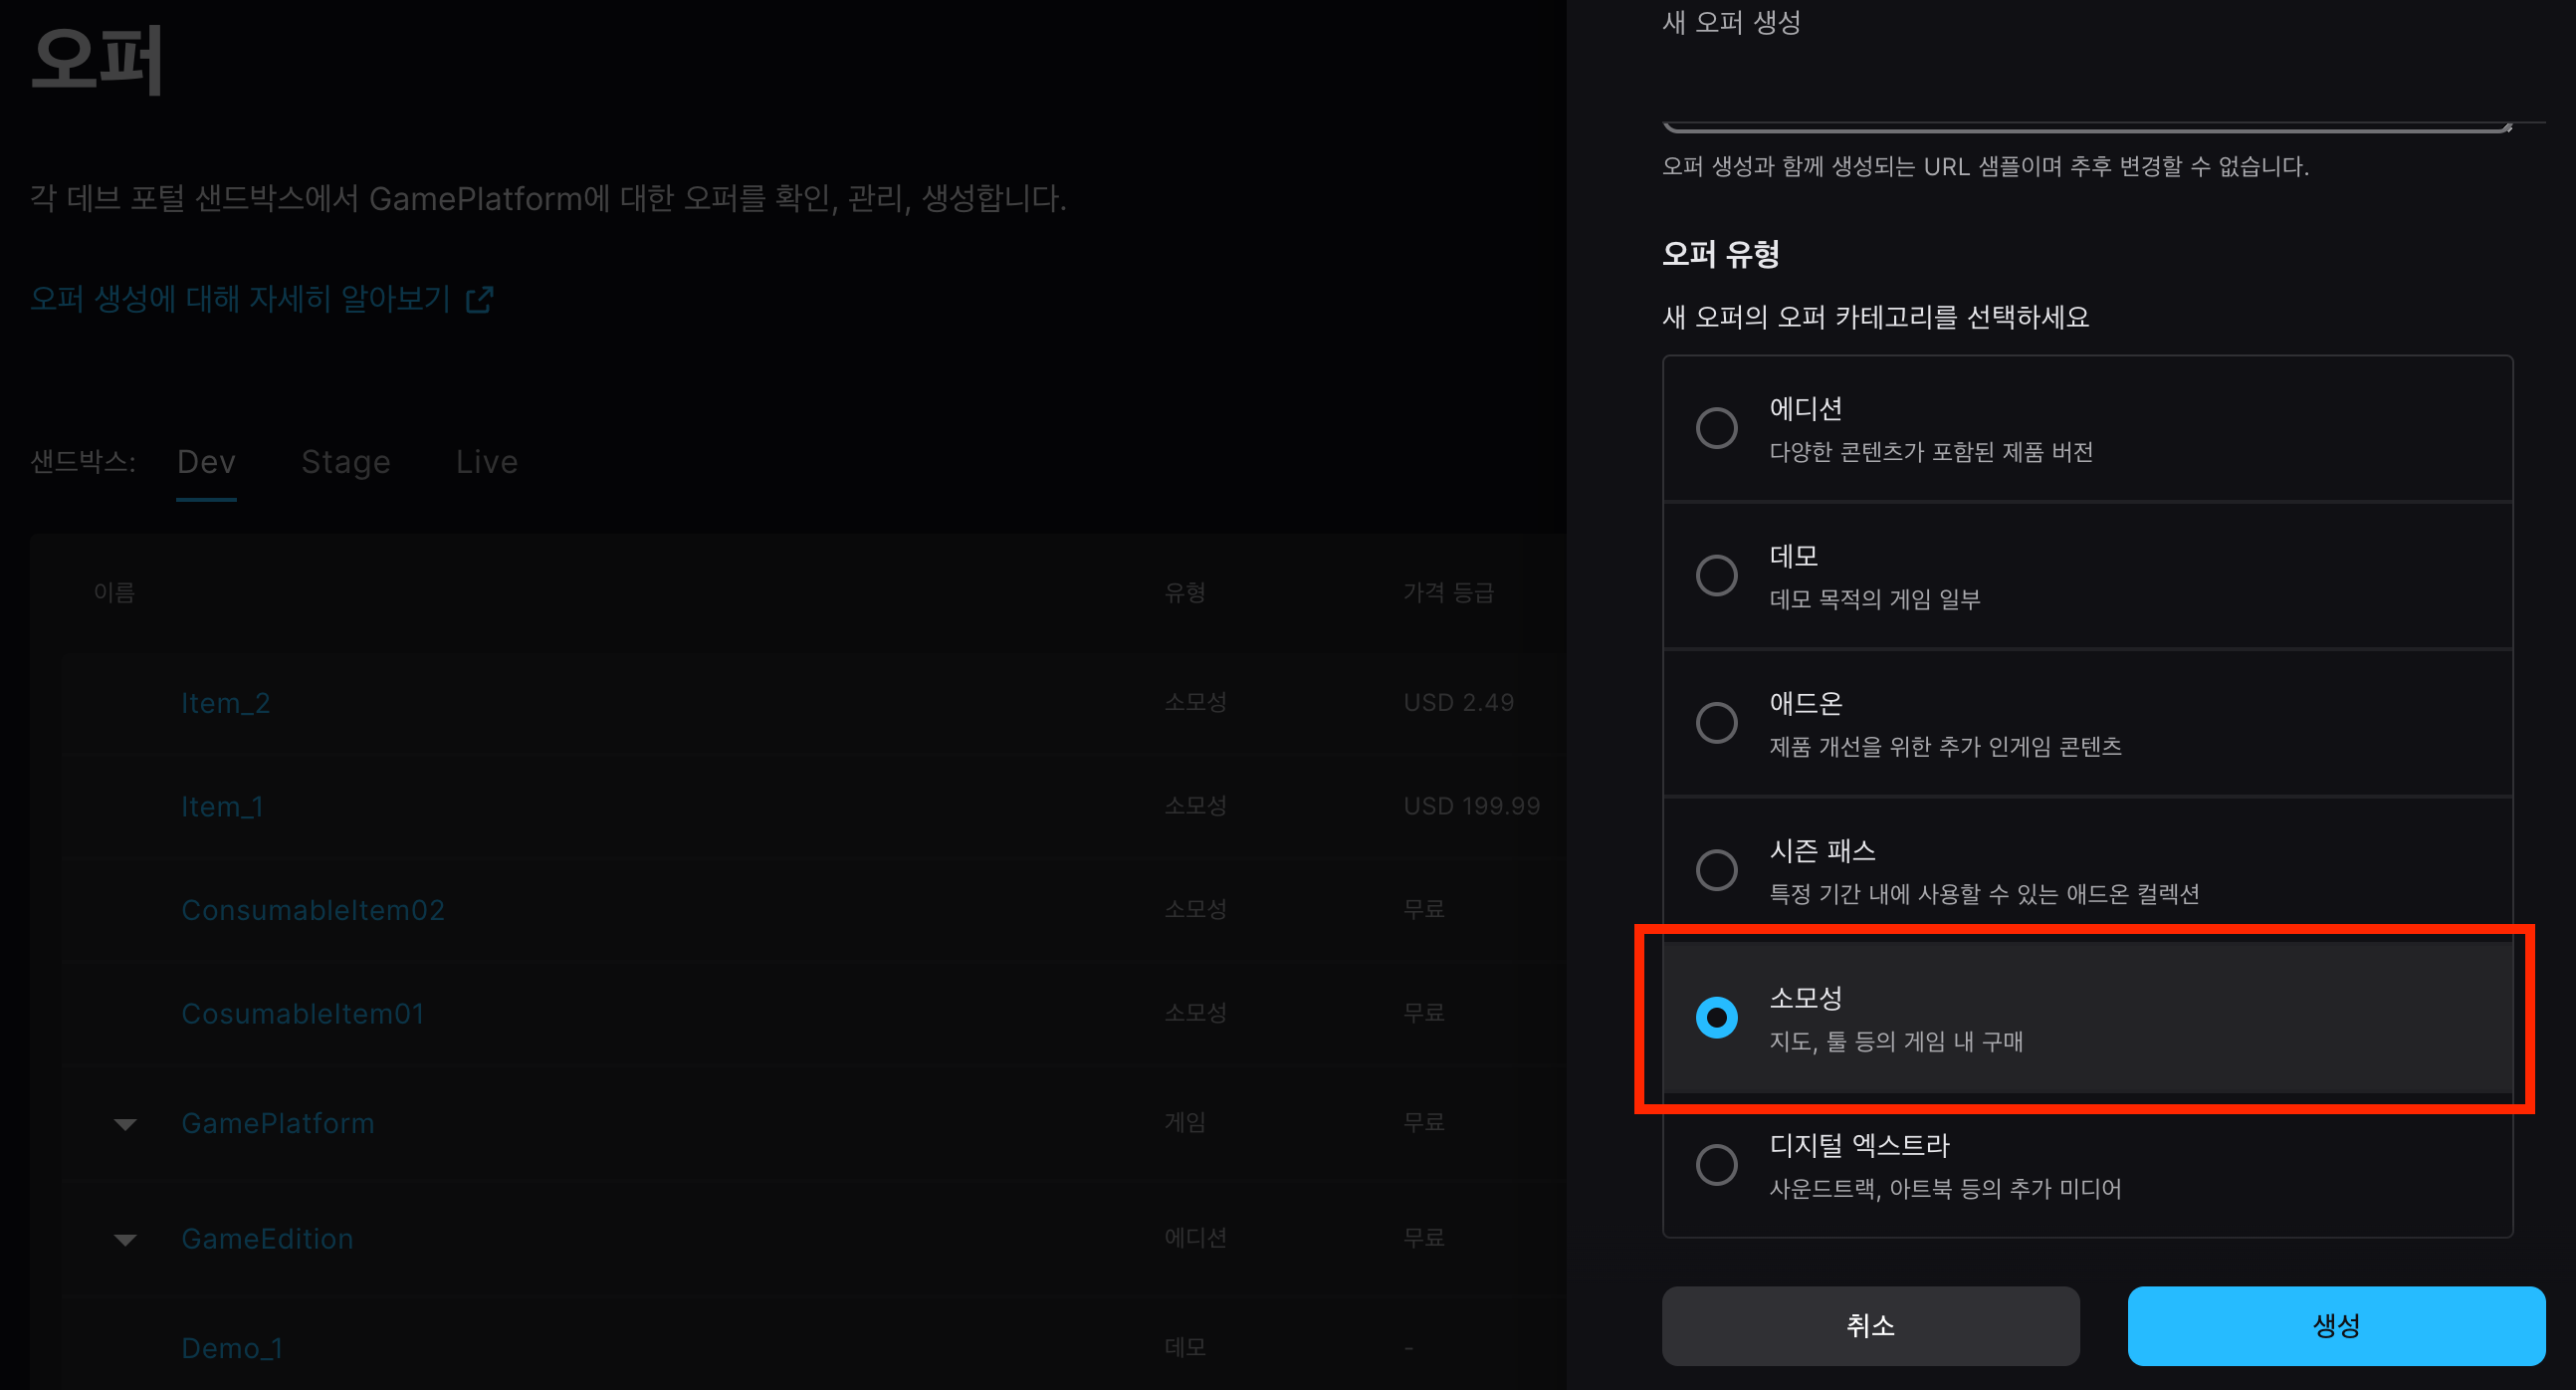
Register Offers
- Register an offer in the Epic Games Store > Offers menu.
- Select consumable for offer type.
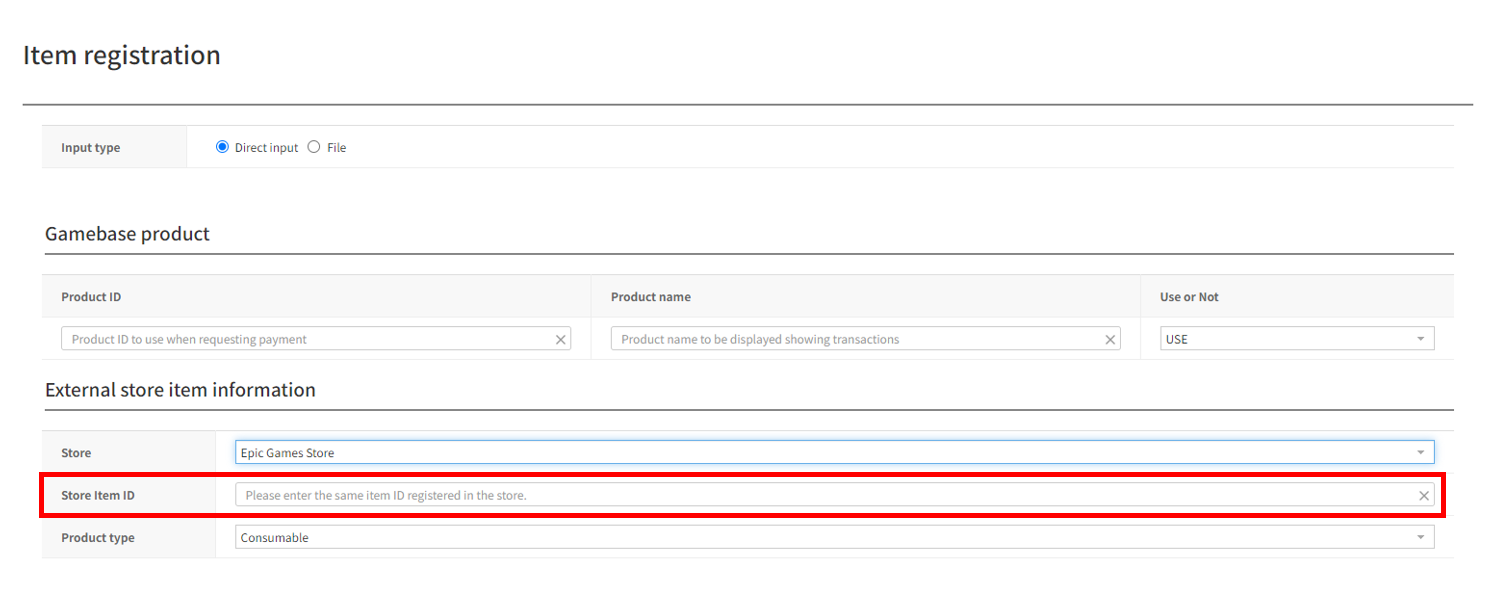
Check Item ID and Register Item
- You can check the item ID in the offer details after registering.
- In the ID item, register the Target Item ID as the Store Item ID of the Gamebase.